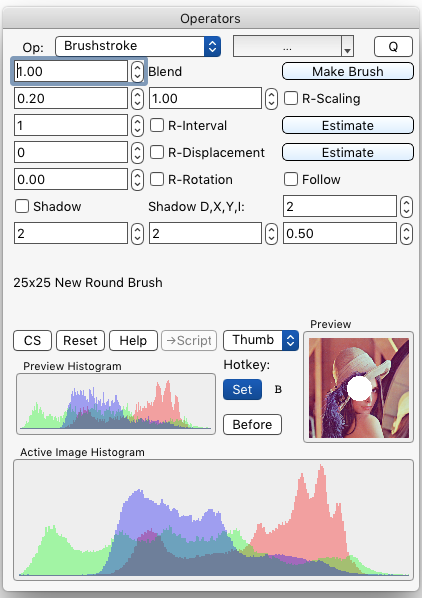
§ 12.11.5 - Brushstroke
No Script CommandStrokes the current brush (which can be any image) along the selected path (ellipse, rectangle, numeric rectangle, polygon, pencil, p-shape), according to the options chosen.
You can create a traditional round or square brush using the Make Brush button in this operator, via the File/New Image ⌘N menu command, or by using the relevant command shortcuts, ⌘-n or control-n.
Brushstroke obeys the ✓ M/Alpha setting.
You assign an image to the role of brush by making it active, then pressing B (shift+b).
§ 12.11.5.1 - Blend

The blend amount can be set from fully transparent, zero (which is pointless) to 1.0, which is fully opaque. This affects the entire brush evenly.
§ 12.11.5.2 - Make Brush
This is a quick way to open the New Image dialog so you can create a brush.
§ 12.11.5.3 - Scaling

There are two scaling settings that may be set from .1 to 10.0. These settings, placed left and right in the dialog respectively, set the smallest scale effect applied to the brush (only active when ✓ R-Scaling is checked, in which case the scale will be between the small value and the large value, described next) and the largest scale effect applied to the brush (always applied.)
To describe this another way, if ✓ R-Scaling is not checked, then the second value applies a constant scale to the brush. If ✓ R-Scaling is checked, then the scale will be some random value between the small setting and the large setting.
§ 12.11.5.4 - Interval

This setting controls the spacing between brush placements along any path. If ✓ R-Interval is checked, the spacing amount applied will be random up to this setting. Estimate will set the value according to the largest scale applied to the brush.
§ 12.11.5.5 - Displacement

This setting alters the horizontal and vertical placement of the brush along any path if ✓ R-Displacement is checked. Estimate will set the maximum displacement to be only as large as the smallest scale of the brush to be generated.
§ 12.11.5.6 - Rotation

If ✓ R-Rotation is not checked, then this setting applies a constant rotation to the brush.
if ✓ R-Rotation is checked, then the rotation will range from zero to a maximum of the value chosen.
If ✓ Follow is checked, then the brush will be rotated to follow the path. The rotation applied presumes that the leading portion of the brush is oriented "up" in the brush image. If it is not, you can apply a constant rotation to adjust for that.
§ 12.11.5.7 - Shadow

If ✓ Shadow is checked, then a dark shadow that is defined by the alpha channel of the brush (its transparency) is generated underneath each brush placement. If the brush is fully opaque, shadowing will not be applied.
The D,X,Y and I settings set the Diffusion, X Offset, Y Offset, and Intensity of the shadowing. D, X and Y all represent pixel distances; I may be set from zero (no shadow at all) to 1.0, which will produce a maximum intensity shadow.
Shadowing only occurs within the dimensions of the brush image.
So if your brush doesn't have enough transparent alpha around the edges to contain the generated shadow detail elsewhere in the image as defined by the X and Y shadow offsets combined with the Diffusion setting, the shadow will be "clipped" by the brush edges.
Consequently, when you create a brush you intend to shadow, either create it with extra transparent space around the actual brush image, or use the xtend keystroke to add whatever space required.
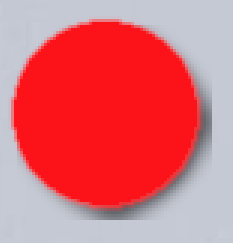
A good rule of thumb is that in order for a particular subject to have enough room to successfully rotate and generate shadows, it should have transparent clearance equal to, or larger than, 1/2 the total width of the opaque portions of the brush on both axes.
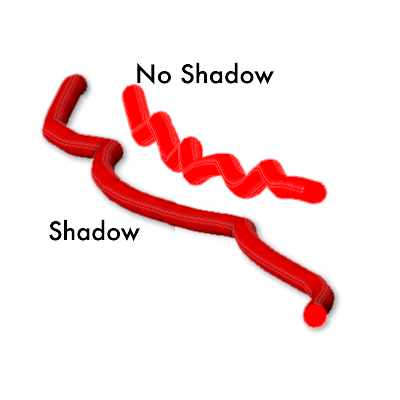
Here, the initial red brush was created as 25x25. That brush was then
extended using the Extend Image dialog by 25 on all four sides, which in turn provided
enough extra pixel "acreage" for a nice shadow to be generated.
The name of the currently selected brush image is displayed at the bottom of the controls area of the Operators dialog.
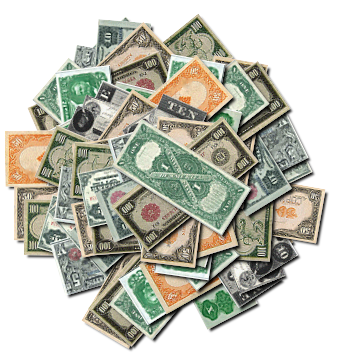
§ 12.11.5.8 - Image Barrels
This operator can treat a layered image as a barrel of separate images, one per layer.
If you select the master image of a layered image, each of the layers in the image that are set to be visible (using the ✓ Visible setting in the Layers dialog) will be used one after another as the brush. For instance, this layered image file (that's a link to an iToolBox .elx layered image file, not a web picture) is a collection of 14 images of old US currency.
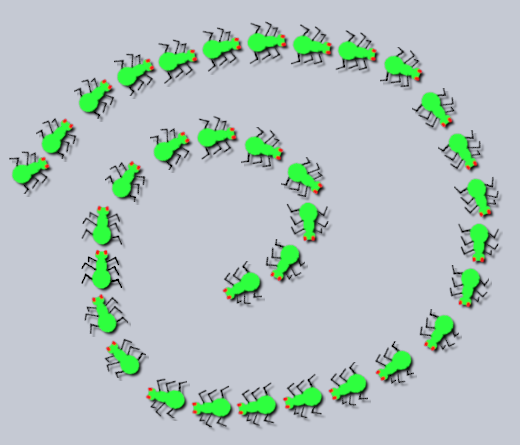
For this image, I selected the master, set the Rotation value to 360.0 degrees so as to allow any possible rotation from 0.0 to 360.0, checked ✓ R-Rotation, then simply scribbled on the image with the pencil tool. As the path was followed, each image layer in turn was used, rotated randomly, and drawn with a shadow.
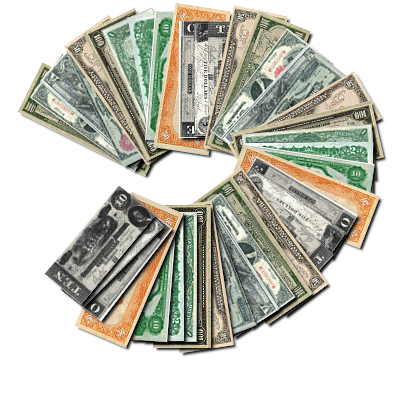
One spiral pencil brushstroke with the oldbills.elx master as brush
The trick to making a pile (of anything) look good is to start on the outside
and spiral in. That way, the most recent images end up on top.
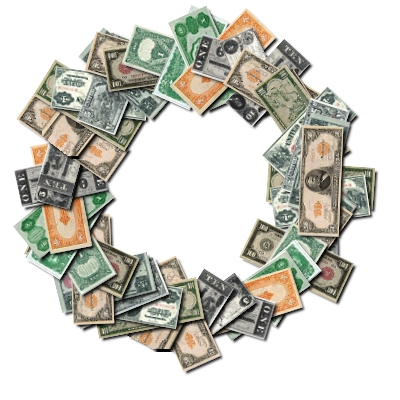

Same barrel with a pencil selection, and ✓ Follow checked
I unchecked ✓ R-Rotation and set the Rotation value to zero
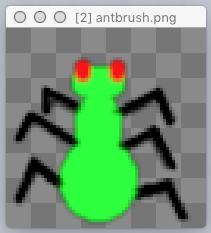
You might be interested in playing with this barrel of Red Ants.
(1): If you select an individual layer of a layered image as a brush, rather than selecting the master, then only that layer will be used as the brush.
(2): If you want to use the actual image in a master as a brush, clone it, and then use the resulting image instead.
It's a lot more difficult to describe than it is to work with. Try it!
, Previous Page . Next Page
t TOC i Index k Keyboard o Operators g Glossary c Changes
![]()
on February 27th, 2026 at 17:38 MT
| Please consider supporting my iToolBox development efforts with a small PayPal donation. |