This is a child page. You can use Parent in the quick nav bar at the top or the bottom of the page to navigate directly back to the parent of this page. Some child pages are more than one level deep, and in that case will require more than one Parent click to reach the outermost document level.

§ 16.90.6.4 - A Basic Example - Red Ball

Any part of your script not bound in angle brackets will be completely disregarded by the Ray Trace operator, and can function as comments within your script. Also, only those lines that begin with valid SceneScript commands will be processed by the Ray Trace operator. White space (spaces, tabs, blank lines) are ignored by F/x, which allows placing explanations and comments anywhere past a command. This example contains comments to help explain elements of the script. This script, as shown here, is 100% functional. The complete contents of this block can be copied, pasted and used as a SceneScript. You can click on any command to link to its entry in the SceneScript language reference. A trait block creates a group of preset characteristics for later use:  <trait "matte"  <ambient .1 Slightly illuminated everywhere  <diffuse .7 Surface diffuses light a good bit  <brilliance 1 Quite bright  <specular 0 No specular highlights  <roughness 0 Is not rough  <transparency 0 Is not transparent at all  <reflectivity 0 Will not reflect other objects  </trait Create a matte red ball:  <normalize Reset object parameters  <position 0 0 0 Place the sphere at the center  <radius 3 Its radius will be 3 units.  <color 1 0 0 Set the color to 100% red, 0% green, 0% blue  <apply "matte" Set the object's surface properties  <object sphere "My Sphere" Instantiate sphere A bound is a speed optimization:  <object bound Create a bound for the tracer Light:  <normalize Reset object parameters  <position 50 50 -75 The light will be far up, left, and back.  <color 1 1 1 The light will be colored white  <object light "light_1" The object is a light source named "light_1". The next two statements are critical. They set up the camera:  <viewlocation 0 0 14 The camera is sitting at the point (0,0,14).  <viewtarget 0 0 0 The camera is "looking at" the origin (0,0,0).

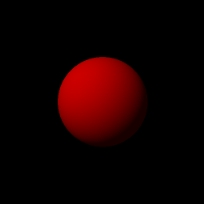
This is the end product of the above script

The above script could have called upon libraries of traits instead of defining "matte" in the script (which was done to keep the example wholly self-contained) with the following commands:

 <libpath "yourpath"  <lib "yourfile.w3d"

Then you can  <apply "matte" and the object will have the same surface properties, which woudl be obtained from the library instead of having to create your own matte trait. For example, here at Black Belt Systems we would include these libraries in the following manner:

 <libpath "c:\w3\"  <lib "textures.w3d"

Once F/x has been informed as to the location and name of the library, any trait contained in textures.w3d would be available for use.

Note that the camera is not an object in the scene, it is a vector defined by where it is ( <viewlocation) and where it is looking ( <viewtarget).

The camera does not alter any part of the scene in any way, it is merely defining the very tip of the viewing frustrum. The camera is basically equivalent to a real-world pinhole camera, in that the aperture is very small — essentially one light ray in size.

Moving on...

Keyboard Navigation
, Previous Page . Next Page t TOC i Index o Operators g Glossary
WinImages F/x, Morph and all associated documentation
Copyright © 1992-2007 Black Belt Systems ALL RIGHTS RESERVED Under the Pan-American Conventions
WinImages F/x Manual Version 7, Revision 6, Level A
Valid HTML 4.01 Loose
 

This manual was generated with wtfm
wtfm uses aa_macro and SqLite
aa_macro uses python 2.7
Page 239
box