§ 17 - Text Generation Dialog
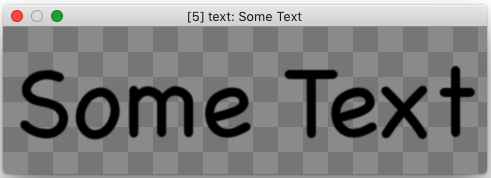
Controls are provided for the font face, the font size, text alignment, color, vertical scale of the resulting image, and antialiasing. You can enter multiple lines of text, or just one. Text is not automatically wrapped when it is generated.
The text is generated into a new image that will be larger than the text itself. To compose the generated text image into another image, you could:
- Set the new text image as the origin image
- Then:
You can control the size of the generated image by checking ✓ V-Scale and setting the associated height value just to its left. If ✓ V-Scale is not checked, the image will be generated to a height that equals the (point size in pixels, + leading), per line, plus an additional transparent margin on all four edges to allow for later shadowing or other effects.
- You can place the text in more than one place, at more than one size, without having to constantly re-create it.
- You can place the text in more than one image without having to re-create it.
- You can do almost anything to the text in its image that would be very difficult to do if the text had already been composed into the target image first.
- You can control the aspect ratio of the text, and its scaling, during the merge operation
- Generated text images are 100% ready to act as image layers, which can then be re-positioned, modified in various ways and so forth.
When typing in the text entry box, if you press tab, this will immediately close the dialog and generate the text. If you press esc, this will immediately close the dialog and cancel text generation.
The ✓ Image-per-line control provides a means to generate a separate image ready for composition for every line of text in the dialog. If ✓ Image-per-line is not checked, then a single image will be created containing all of the text.
The text generation dialog blocks; that is, you have to close it before you can do anything with the rest of the application.

The other way to do this is to create the text, ensure the Areatools's ✓ M/Alpha is checked, then just use any operator to directly alter the text image's content. The difference with this approach is that where the text edge is smoothed by the alpha channel, the merge operation will be partial, which in turn will leave some of the text image's background color in place. Sometimes, this may be what you want; for instance, for black text on a black backdrop, using this approach will give you a darkish edge while the merged content elsewhere is unaffected. Here's how that looks:

Directly range filled using Areatools's ✓ M/Alpha setting
Compare the edges of the text in this image with the one above;
it's a subtle but distinct difference.
There are four preset buttons, initially shown as ps1 through ps4. If you Edit beneath one of the presets, you can change the content generated for that button, and the button's name (there is a maximum limit of 11 characters for a button name, and they must be some combination of alphanumeric characters, a space, underline or a dash.)

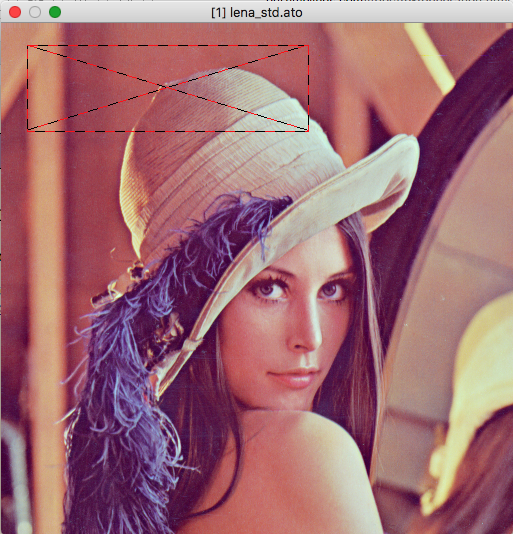
When making a rectangular area selection for merge, the rectangle area tool displays guides that match the aspect of the text origin image so you can place it accurately, in a non-distorted, aspect-correct manner.
If the selection is smaller than the origin image, the guides will be red. If the selection size matches the origin image, the guides will be green. If the selection is larger than the origin image, the guides will be yellow.
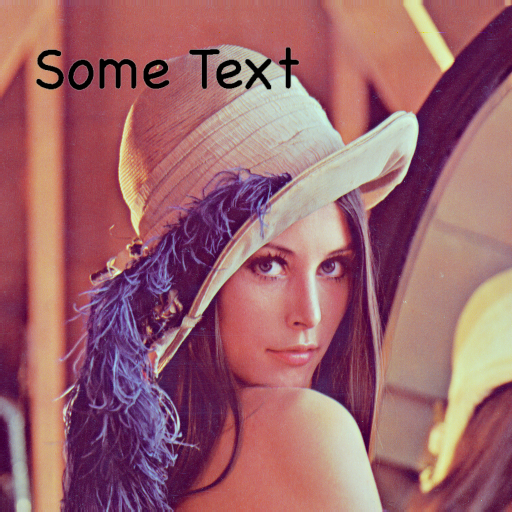
In the example placement shown, the merge region is considerably smaller than the source text image. So the placement guides are red, indicating that the placement is not using all the available resolution. The text in the example was generated with a very large (100 point) font. In the view below, you can see that between the large, high-quality text itself, and the careful scaling done by the merge operator, the end result is very nice even though it doesn't use all of the available detail in the generated text.

The F, B and S buttons allow you to set the text and/or back colors from the fore color, the back color, and the sample (average) color.
Another very useful operator for text placement is the Place operator.
§ 17.1 - Text Substitution in the Text Dialog
You can write lines in the text entry dialog in this form...
{tvar} NAME=VALUE
...and anywhere in the text NAME appears, it will be replaced with VALUE. For instance...
{tvar} MYNAME=Ben
My name is MYNAME
...will generate:
My name is Ben
You may use the Presets button to set up any {tvar} replacements you want generally available to you. Enter them one per line, as shown above. {tvar} values may include the content generations detailed next. For instance, if it is 1:04 UTC...
{tvar} NOW={utctime} UTC
The time is NOW
...will generate:
The time is 1:04 UTC
You can cascade {tvar} replacements, so this...
{tvar} YURMOTHER=MOM
{tvar} MOM=Mildred
Your mother's name is YURMOTHER
...will generate...
Your mother's name is Mildred
...because replacements are done in the order they are defined. So first, YURMOTHER was replaced with MOM, and then MOM was replaced with MILDRED.
§ 17.2 - Prompted Text Substitution
{prompt} NAME=PROMPT-TEXT
This works very much like {tvar}, except a dialog will appear at text generation time which will ask you for the value, rather than setting a preset value. The PROMPT-TEXT is used in the dialog to label the text input field.
§ 17.3 - Generating other content into the Text Dialog
{shell} NAME=command
In the text, NAME will be replaced with the output of the given shell command. This operation does not use the user's selected shell, so you can't use pipes; however, what you can do is call something more sophisticated such as Python and have it mange any complicated text generation you like. The one thing that is done for you is that ~ is expanded into your home folder. So for instance..
{shell} RESULT=python ~/mytextgenerator.py
My result was RESULT
Any {tvar} items you declare before a {shell} command will be expanded and then used. So...
{tvar} GLAK=mytextgenerator
{shell} RESULT=python ~/GLAK.py
My result was RESULT
...will expand to {shell} RESULT=python ~/mytextgenerator.py and therefore replace RESULT as desired, but...
{shell} RESULT=python ~/GLAK.py
{tvar} GLAK=mytextgenerator
My result was RESULT
...will not work because GLAK was undefined until after the {shell} command was parsed.
{utcdate} is replaced with the date (YYYY/MM/DD) in universal coordinated time.
{utctime} is replaced with the time (HH:MM) in universal coordinated time.
{shell} LOCTIME=date +"%H:%M"
The time is LOCTIME
§ 17.3.1 - Simple Substitutions
{platform} is replaced with Windows or OSX/MacOS
{software} is replaced with iToolBox (Why? Because if I ever change the name of the software, any text generation written this way will remain accurate, that's why.  )
)
{version} is replaced with the current version of iToolBox
{font} is replaced with the name of the font in use.
{points} is replaced with the size in points of the font in use.
{signature} is replaced with the signature from the Meta Defaults dialog accessed from the Preferences dialog.
{author} is replaced with the author information from the Meta Defaults dialog accessed from the Preferences dialog.
{copyright} is replaced with the copyright information from the Meta Defaults dialog accessed from the Preferences dialog.
{annotation} is replaced with the annotation information from the Meta Defaults dialog accessed from the Preferences dialog.
{callsign} is replaced with the callsign from the Meta Defaults dialog accessed from the Preferences dialog.
{latitude} is replaced with the decimal latitude from the Meta Defaults dialog accessed from the Preferences dialog.
{longitude} is replaced with the decimal longitude from the Meta Defaults dialog accessed from the Preferences dialog.
{latitudedms} is replaced with the degrees-minutes-seconds conversion of the decimal latitude from the Meta Defaults dialog accessed from the Preferences dialog. Seconds are rounded to one decimal place.
{longitudedms} is replaced with the degrees-minutes-seconds conversion of the decimal longitude from the Meta Defaults dialog accessed from the Preferences dialog. Seconds are rounded to one decimal place.
{altitude} is replaced with the decimal altitude in meters from the Meta Defaults dialog accessed from the Preferences dialog.
{altitudefeet} is replaced with the decimal altitude in feet from the Meta Defaults dialog accessed from the Preferences dialog.
{ls} is replaced with {
{rs} is replaced with }
{vbar} is repaced with |
, Previous Page . Next Page
t TOC i Index k Keyboard o Operators g Glossary c Changes
![]()
on February 27th, 2026 at 17:38 MT
| Please consider supporting my iToolBox development efforts with a small PayPal donation. |