§ 19.6.9 - Geometric Blend Mode
§ 19.6.9.1 - Warp
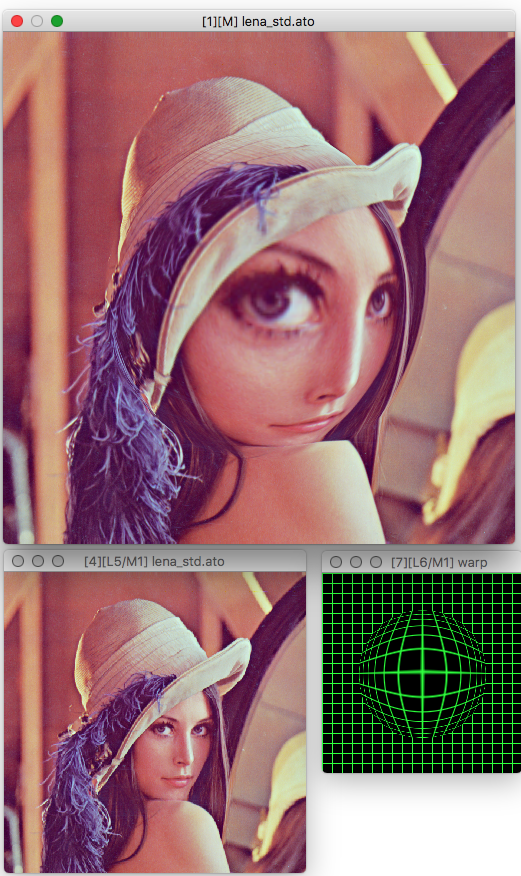
This layer mode allows you to emplace geometric manipulations (distortions and so on) in a layer. These distortions can then be moved up and down through the layer stack, re-positioned over the underlying layers, turned on and off and so forth. This is an extremely flexible, non-destructive, and useful way to implement geometric changes in layered images.
You can only create a warp layer within the layer dialog. You cannot convert a normal layer into a warp layer. If you detach a warp layer, it becomes a normal atomic image containing 100% white at 0% transparency. You can only attach normal, atomic images as normal layers, and having done that, you can't convert them back into warp layers. So if you want to toss a warp out, be sure you want to do it. Otherwise, just turn off ✓ Visible, and it'll be ignored with no performance penalty, but not lost. You can't merge a warp layer — it reads as fully transparent so there's no result — and cropping one results in a white, transparent image, so not much point in that either. 
You can stack warps, and you can even warp warps; but you'll probably not get the results you expect if you try to put more than one warp effect on top of another in a single warp layer. Interacting geometric behavior that is directly modifying other geometric behavior is... not always intuitive. Instead, create an additional warp layer and put the effect in that layer. Then the effects will stack in an intuitive manner, because the geometric modifications occur in isolation from one another.
Warp layers do not affect transparency, other than to alter its position along with the pixel content.
The following operators can be used to manipulate warp layers:
- Bend
- Caricature
- Dome
- Kaleidoscope
- Keystone
- Mirror
- Perspective
- Radial Wave
- Roll
- Rotation
- Skew
- Stretch
- Swirl
, Previous Page . Next Page
t TOC i Index k Keyboard o Operators g Glossary c Changes
| Please consider supporting my iToolBox development efforts with a small PayPal donation. |
