| This is a child page. You can use Parent in the quick nav bar at the top or the bottom of the page to navigate directly back to the parent of this page. Some child pages are more than one level deep, and in that case will require more than one Parent click to reach the outermost document level. |
§ 25.6 - Gel Button Tutorial
This tutorial assumes you are familiar with F/x's Palette.
This tutorial shows you how to quickly and easily create a beautiful translucent button suitable for use on web pages or simple as art. In the process you will use the Linear Fill operation, Transparency with the Color Fill operation, and many features of the software's Layering capabilities.
Before beginning the tutorial, some settings that affect how area selections work need to be made. Drop down the Area menu and make sure that these options are set as follows:
✓ Antialias Area Selections
✓ Opaque Fills
✓ Mask With Target Alpha
In addition, so your image windows look the same as we have shown them here, drop down the Display menu and make sure the following option is not checked:
✓ Checkered Alpha
§ 25.6.1 - Tutorial Steps
-
Create a blank white image
Using the menu command File / New Image, set the dialog as shown to create the image on the right, including the white backdrop color:
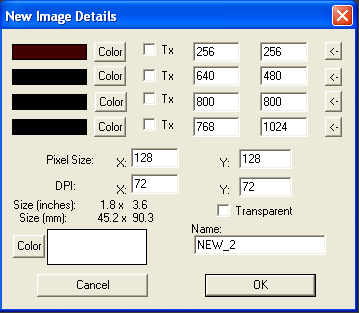
New Image Dialog
Resulting Atomic ("flat") Image -
Create the Layers for the main gel
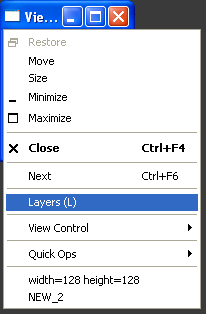
With the new image as the active view (just click once on its titlebar), press the "L" key or select Layers from the view's context menu, available at the left end of the image's title bar.
First, you'll get a message that the image is flat, asking if you want to convert it to a layered image. Click OK. The Layers dialog now opens.
The first thing to do here is click Rename Base and change the basename to "Gel".
Next, click Rename Layer and change the layer name to "backdrop".
Now click Create, then Rename Layer and change the new layer's name to "highlight".
Click Create again, then Rename Layer and change the newest layer's name to "lens".
Click on the backdrop layer, then click Deeper twice, which moves the backdrop layer to the lowest of the viewable stack of Layers.
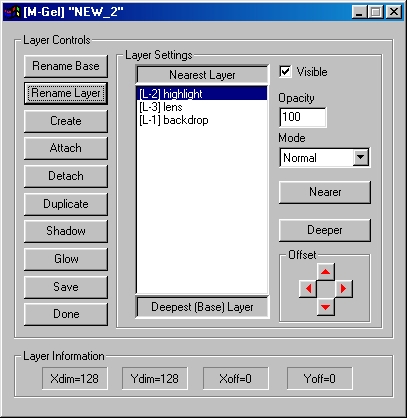
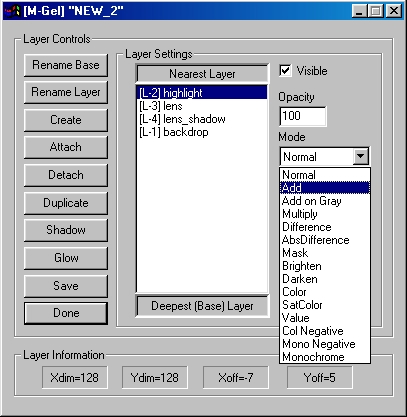
At this point, the Layers dialog should look just like this, with the possible exception of the "NEW_2" in the titlebar:
Now click Done to close the Layers dialog. You will find you have a group of images that consist of a master view marked "", and three Layers, marked [L-1], [L-2] and [L-3].
-
Set up the Linear Fill operation to create the lens colors
Locate the [L-3] (lens) image and move it so that it is not covered by any other image.
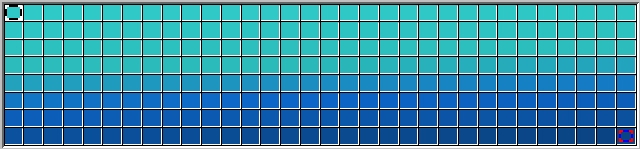
Now select the Pattern / Linear Fill operation in the toolbar using the left mouse button to hit Pattern, and the right mouse button to hit Linear Fill. The operation dialog will open. Change the angle parameter to 135, the cycle parameter to zero, and check ✓ Smooth . Now click Set Palette, and create the following color range using the Palette tools:
Just as a quick hint, the fastest way to make this palette is by creating the four colors shown below, then using Luma Spread to create three ranges between them as indicated by the red lines:
-
Draw the lens
Set the Toolbox for perfect circles as shown below, using the Ellipse area selection tool with the Hold Square modifier. Then pull out a small circle in the lens layer. You should get results similar to those shown below, on the right:
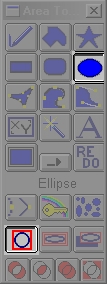
Tool Palette set for
perfect circles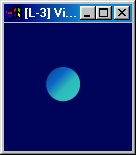
Resulting areafill -
Create the highlight
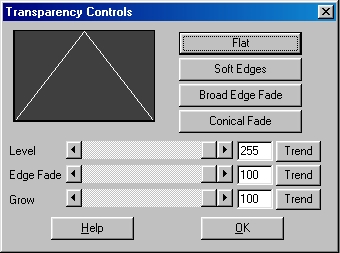
Select Transparency Controls from the Area menu to open the Transparency dialog. Click Conical Fade, and then OK for the results shown below:
Now select the Standard / Color Fill operation in the toolbar using the left mouse button to hit Standard, and the right mouse button to hit Color Fill. The operation dialog will open. Change the color to white by either clicking Set Color control, or by changing the RGB components in the dialog to 255.
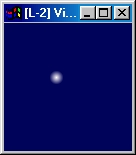
Locate the "highlight" layer and arrange the windows so that you can work on the layer easily. Now pull out a small circle (the Toolbox is still set for perfect circles) as shown here; the location isn't critical, but aim about for where the center of the position where you drew the gel lens in the lens layer. If you accidentally get the highlight located over the white backdrop, you won't be able to see it, and that might be confusing:
-
Reposition the highlight (offset it)
Now locate the master image (the title bar says [M-gel]) and place it where you can see it. Also make sure that you can see the highlight layer at the same time. The highlight should be visible in the master, if you got it in the general area of the lens. If you didn't, undo the highlight and place it again so it shows in the master image over the lens somewhere.
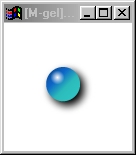
The highlight is probably still not placed correctly as we show below at left, so click on the highlight's title bar to select that layer, and press the cursor keys while watching the master image until the highlight is positioned as shown at below right:
Initial position incorrect,
but visible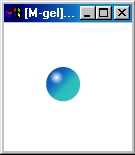
After offset with cursor keys -
Create a shadow layer
With any layer or the master view selected, press the "L" key or select Layers from the view's context menu:
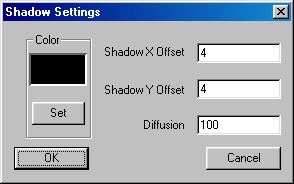
When the layer dialog opens, select the lens layer by left clicking on it, and then click Shadow
The shadow dialog will open; set it as shown here:
Click OK and the shadow layer will be generated. Now left click on the highlight layer in the layer list, and change its mode to Add. This will result in the highlight desaturating the gel color, which is also what a bright reflection does. The image below shows how to do this:
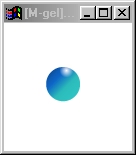
Close the Layers dialog by clicking Done, and you should see the following result in the master view:
Here it is with the shadow...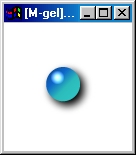
...and here after the highlight layer has been changed to Add.

, Previous Page . Next Page t TOC i Index o Operators g Glossary
Copyright © 1992-2007 Black Belt Systems ALL RIGHTS RESERVED Under the Pan-American Conventions
WinImages F/x Manual Version 7, Revision 6, Level A
![]()