§ 23 - The Palette Dialog
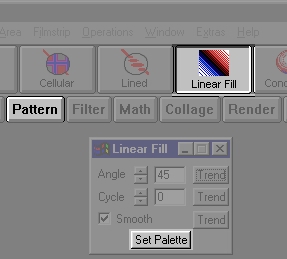
You'll find it easier to understand the descriptions here if you have the palette dialog open when you read them, so you can experiment. A quick way to do that is to left click on the Pattern button in the Chapter Bar, then right click on the Linear Fill button in the Verse Bar, then left click on Set Palette in the Linear Fill operation dialog.
F/x's palette control allows you to manipulate and alter existing palettes or create new palettes and ranges of color. The Palette controls include operations that will merge two palettes, insert a new palette, mirror the palette, and create various color spreads and sorts. This tool is particularly useful for loading a specific palette for an animation, thus keeping the original palette intact. The palette is also useful for setting a range of colors for one of F/x's many fill operations.
F/x's palette can load Microsoft Windows Paintbrush palettes, AVI (Video for Windows) palettes, Bitmap palettes, Adobe Color Table (ACT) palettes, and IFF palettes.
The palette itself is broken up into a number of squares which contain the colors in the current palette. You have the option to increase or decrease the number of squares or cells available in the palette. Your palettes can contain anywhere between 2 and 1024 separate color cells.
Throughout the remainder of the documentation the terms "left color" and "right color" will be used to describe the to palette position selectors. The "left color" is a white with black marker that outlines the current color. This color can be altered using the Hue and Saturation Color Wheel, or the provided RGB text entry fields. This color is the starting point for all spreads, fills, and mirrors. The left color position can be altered by clicking on the palette with the left mouse button. The "right color" is a blue and red marker which defines the ending position for all spreads fills and mirrors.
You cannot manipulate the right color. You do have the option of copying the left color into the right color position, or you can move the left color to the right color position to alter the color, and then move the left color back to its initial position. The right color's position can be altered by pressing the right mouse button while over the desired palette position.
§ 23.1 - Palette Controls
§ 23.1.1 - Hue and Saturation Color Wheel

The Hue and Saturation color slice allows you to select a color's Hue and Saturation values. These values are then combined with the Luminance setting (the control to the right) to create a color. The Hue and Saturation "wheel" begins with red and then moves through yellow, green, cyan, blue, magenta, and then back to red. The color is "purest" (has the most saturation) at the edge of the wheel, and as you move in towards the center of the wheel the saturation drops. The center of the wheel is a gray scale value.
A color is selected by simply clicking, and holding the left mouse button on the color wheel. You can then move the mouse towards the desired color. The current color that the mouse is over will be displayed in the Color Preview Box to the right of the luminance control. Once you have the color you desire, or a lighter or darker version of the desired color, release the left mouse button.
Remember, the left mouse button controls the "left color" or the beginning of any range spreads. You can place a color in the "right color" or end of the range spread by copying the desired color from the left color, and then setting the right color to the desired color. The "brightness" of the color can be altered using the Luminance control. For example, you have a Red color (R=225, G=25, B=32, and Luminance at about 50%), but it is not dark enough for the range you are creating. So, you would adjust the Luminance to about 25%, and the new red would be much darker (R=102, G=15, and B=25).
You do not need to use the color wheel and luminance color to create or specify colors. You have the option of manually altering the RGB (or CMYK, HSL, etc.) values in the provided text entry fields. By doing this you can increment one or more of the components to a specific value. For more information on using the Hue and Saturation wheel, please refer to the sections below on creating spreads and ranges of colors.
§ 23.1.2 - Luminance Control
The Luminance control allows you to specify the brightness or luminosity of the color in the preview area. The Luminance is measured on a percentage scale from 0 to 100. A setting of zero will result in no luminance (black), and a setting of 100 will result in the maximum possible luminance (white). This is true regardless of the current selected color.
For example, a red color can be made black by setting the Luminance control to 0 (bottom of the Luminance control), or it could be made white by setting the control to 100 (top of the Luminance control). A setting in the middle of the control (50%) will produce colors which are completely saturated or "pure colors".
The luminance is set by simply clicking, and holding, the left mouse button over the luminance control. As you move the mouse, you should see the color in the preview increase or decrease in brightness as you move the mouse up and down the control. The preview will reflect all changes that you make to the luminance as they are made. When you have the desired color, release the left mouse button. The color you see in the preview will also be placed in the "left color" position.
§ 23.1.3 - Color Preview Box
The preview box contains the currently selected "left color". This color can be specified using the Hue and Saturation color wheel, or the RGB entry fields to the right of the preview. Any changes made to the color wheel, luminance control, or the RGB entry fields will be directly reflected in the preview color and the "left color" in the palette itself. This color can then be copied to the "right color" position by selecting the Copy button.
§ 23.1.4 - Size
The Size control is used to set the actual size or number of colors in the palette. This value can range between 2 and 1024 colors. If you increase or decrease the size of the current palette, either more cells will be added or some of the current cells will be eliminated. The cell size will decrease as the number of colors increase. This means that a palette of 1024 colors will have extremely small cells for the colors in the palette.
If you are loading a palette which contains more colors than the current palette, F/x will automatically increase the size of the palette to accommodate the new palette.
§ 23.1.5 - Position
The Position control displays the current "left color" position, and can be used to manipulate the position of the left color marker. The up and down arrows can be used to move the left color marker through the palette, or you can enter a value in the provided text entry field.
If you specify a numeric value which is beyond the size of the current palette, F/x will place the left color marker in the last available color cell. Remember, manipulating the Hue and Saturation color wheel, the Luminance slider, or the numeric color inputs will change the current left color. This is done regardless of the position of the left color marker.
§ 23.1.6 - Color Spaces
This drop down box contains a wide variety of colors spaces commonly used in graphics, desktop publishing, desktop video, and NTSC video. The color spaces include RGB (red, green, blue), CMY (cyan, magenta, yellow), CMYK (cyan, magenta, yellow, black), HSL (hue, saturation, luminance), HSV (hue, saturation, value), and YIQ (luminance, chrominance). The default color space is RGB, but can be changed at any time by accessing this dialog, and double clicking on the desired color space.
Once the new color space has been selected, all of the values will be recalculated to reflect the differences between the spaces. It is important to remember that F/x is dealing with pure colors, not real colors. This allows for conversion from color space to color space without altering the current "left color". The color space's letter equivalents will be placed in front of the appropriate dialog, and can be altered as described below.
§ 23.1.7 - RGB (or CMYK, CMY, HSV, HSL, YIQ)

The RGB controls allow you to enter specific Red, Green, and Blue values for the current "left color". Each of these components has two methods of entering the desired color values.
The first is to simply manually enter the exact numeric values. This will alter the preview and "left color" colors.
The second method is to use the up down gadgets located to the left of each text entry field. These allow you to increase or decrease the desired color component by clicking on the appropriate gadget (up for a value increase and down for a value decrease).
You should notice that there are multiple color spaces available to you. You can alter the change the current color space by following the procedure described in the above section.
§ 23.1.8 - Hue Sort
Hue SortThe Hue Sort control will sort all of the colors currently between the left and right colors. This sort will rearrange the colors according to their individual hue settings. This includes all gray scales and color values between the left and right color markers. The hue sort begins with red and then moves through yellow, green, cyan, blue, and ends with magenta.
If a gray scale color contains a portion of one of the above mentioned colors, it will be sorted in that color group. The colors themselves are sorted with the groups based on their saturation. This means that darker colors will always come before lighter colors of the same hue.
You also have the option of sorting the colors "backwards" by pressing Shift key and then this button. You can always undo the last change that you've made to the palette by selecting the palette's Undo button.
§ 23.1.9 - Luma Sort
Luma SortThe Luma Sort option allows you to sort all of the colors in the current palette by their luminance or brightness. Once this option is selected, F/x will evaluate the palette and reorder the colors based on each color's RGB brightness value from dark to light.
If you were to select this option for the default palette, you would notice that the palette is already sorted on luminance. The sort will only occur between the "left color" and the "right color" of the palette. All other colors outside of these markers will not be altered.
You also have the option of sorting the colors "backwards" by pressing Shift and then this button. You can always undo the last change that you've made to the palette by selecting the palette's Undo button.
§ 23.1.10 - Hue Spread
Hue SpreadThe Hue Spread option will create a spread of colors between the current "left color" and "right color" using the hue values of those two colors. There are two methods of applying the Hue Spread. The first is to simply press the Hue Spread button. This will produce a spread of colors between the current left and right colors without cycling through the complete hue spectrum.
For example, a Hue Spread from red to magenta would simply create a range from red to magenta without cycling through yellow, green, cyan, and blue to get to magenta. This method can be thought of as a "shortest path" method. This means that F/x will take the shortest Hue distance to reach the specified right color. The second method requires you to press and hold Shift while pressing the Hue Spread button. This will cause the new range to go through all of the colors linearly to reach the specified right color.
If we use the above example, the hue spread from red to magenta would start with red, pass through yellow, green, cyan, blue, and would end with magenta. It is important to remember that the spread will only evaluate the current left and right colors. All other colors in the palette will be ignored. This includes all of the colors between the left and right colors. The new colors created by this spread will be determined by the initial left and right color.
As an example, setting the left color to red (R=255, G=0, B=0) and the right color to magenta (R=255, G=0, B=255), and then applying a hue spread, with the shift button down, between the two will create a range of colors that is very similar to the Hue and Saturation color wheel (beginning with red and then moving through yellow, green, cyan, blue, and ending with magenta).
It is important to remember that F/x does not always have to cycle the colors when doing a hue spread. For example, a non-shifted spread between yellow and red would be the exact inverse of a non-shifted spread between red and yellow. This is done to allow you the option of creating color ranges that are the inverse of one another. Remember that pressing Shift in conjunction with this button will cause the spread to "cycle" through the hue space to create the spread. You can always undo the last change that you've made to the palette by selecting the palette's Undo button.
§ 23.1.11 - Luma Spread
Luma SpreadThe Luma Spread operation allows you to create a spread or range of colors between the current left and right colors based on their initial luminance. The luminance that F/x uses is a measure of actual RGB brightness of the left and right colors. For example, the Hue Spread mentioned above went from red to magenta based on the hue values of the left and right colors. A Luma Spread of the same two colors would differ in that the colors created by the spread operation would be "between" red and magenta. The colors that are created would gradually shift in brightness and shade from red to magenta, with each color being slightly darker or lighter than the previous.
You can always undo the last change that you've made to the palette by selecting the palette's Undo button.
§ 23.1.12 - Insert
InsertThe Insert option allows you to insert a palette of colors based on the position of the "left color" marker. This allows you to insert or append another palette into the current palette. After you have selected this button, you will be presented with a file requester for selecting the palette to be inserted. Once you have selected the desired palette file, select Ok.
This will automatically load and insert the specified palette in the current left color position. If the palette which is being inserted is larger than the remaining space in the palette, the additional colors will be placed beyond the total number of visible colors. If you were to increase the total number of visible colors in the palette (increase the Size value), the colors that were inserted beyond the original palette will become visible. F/x will only use the number of colors specified in the Size control regardless of any colors that have been inserted beyond the visible palette.
§ 23.1.13 - Full View Palette
This display of the palette shows the entire current palette in a linear format. This gives you a better idea of how the actual palette will appear when it is applied as a fill. Each color in the physical palette is represented by a corresponding color in the Full View display for palettes of 256 colors or less.
§ 23.1.14 - Load Range
Ld RngThis option allows you to load an already saved range of colors into the palette. A range of colors is a group of colors that make up a palette, but need not be the entire palette. These color ranges can be saved by selecting the range of colors with the left and right position markers, and then pressing the Save Range button.
§ 23.1.15 - Save Range
Sv RngThe Save Range button allows you to save the colors currently between the left and right color markers. This range can then be loaded back into the palette by pressing the Load Range button, and selecting the desired color range file.
§ 23.1.16 - Merge
MergeThe Merge option is used to merge together two separate palettes. The first step in using the merge option is to load the palette which will have colors merged into it. The next step is to press the Merge button. This will access a file requester which can be used to select the palette file to be merged.
Once you have selected the desired palette file, press OK. F/x will now merge the two palettes by comparing the colors of both palettes, and selecting the colors which best represent both palettes.
This tool is especially effective for creating render palettes for animations based on two separate palettes.
§ 23.1.17 - Copy
CopyThe Copy button will copy the current left color into the right color. This can be useful for specifying the right color for spreads and sorts. After you have copied the left color, you can then specify a new left color to be used for multiple color spreads.
§ 23.1.18 - Swap
SwapThe Swap option will swap the current left and right color. Only the colors will be swapped. The left and right color markers will remain in the same position. Pressing Swap again will return the colors to their original position.
§ 23.1.19 - Mirror
MirrorThe Mirror operation will mirror the colors in between the current left and right color markers. The mirror will be a "reflection" of the range of colors based on the center position of the range. F/x will have to eliminate some colors to do this, but the overall effect is very dramatic.
For example, if there were 32 colors between the left and right color markers, only 16 colors would be used and reflected inside the 32 color range. This means that half of the colors will be eliminated. You also have the option of applying multiple mirror's to the same range which can create some very stunning results.
§ 23.1.20 - Repeat
RepeatThe Repeat option will repeat the range of colors currently between the left and right color markers. F/x will evaluate the colors that it finds, and will then repeat the entire range of colors inside the two markers.
For example, if you were to repeat the default gray scale palette, you would see two ranges of colors that start with black and move to white. Selecting the Repeat button again will repeat the two gray scale ranges, and will create a palette with a total of four black to white ranges. You should also notice that some of the colors are eliminated. This is due to the fact that F/x will only repeat within the left and right markers. This means that some colors will be eliminated.
If you placed the left marker in position 0 and the right marker in position 31, only the colors between positions 0 and 32 would be repeated. This is a total of 32 colors in-between the left and right marker. This means that F/x will select 16 colors from the original 32, and then repeat them. In this case, F/x would select every other color in the range, and then repeat these colors. You can always undo the last change that you've made to the palette by selecting the palette's Undo button.
§ 23.1.21 - Named Colors
The Named Colors section of the Palette dialog allows you to give names to specific RGB values. For example, the default named colors file (colorset.ini) contains such colors as Cobalt Blue and Carnation Pink. These two colors have specific RGB values, but also have a name associated with them. The controls in this portion of the dialog can be used to add additional colors and names to the colorset.clr file, remove colors from the file, or replace existing colors with new RGB values or names.
A named color is placed into the palette and preview color box by simply selecting the desired named color, and then clicking on the named color preview color box to the right of the list. This will automatically place the named color into the left color position of the palette, and will adjust the RGB values accordingly. The intent of the named colors are to allow you to specifically name colors that you use frequently. This means that you no longer have to remember an obscure RGB value, but can instead remember a name which describes the color in question.
The Named Color section of this palette dialog can be particularly useful for operations like Color Fill or Colorize.
All of the Named Colors are kept in an ASCII text file called colorset.ini located in your Windows directory. You can use any Text Editor to add new named colors to the file. You may find this method to be faster if you are entering multiple colors and names.
The instructions at the top of the file describe the method for adding new colors to the list.
Once you have added the desired colors and names save the file and exit the text editor. The next time that you open the palette the new named colors will be available. Remember, the named colors file (colorset.ini) is used for both the palette and the Pick Color selection dialog. This is not the only method of adding colors to the named colors list. Named colors can be added to the list in both the palette and color selector by pressing the Add button. The Add button's use is described below in the Add documentation.
§ 23.1.22 - Find
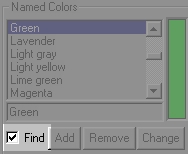
The Find control, when selected, will force F/x to find the color in the named colors list that is closest to the current color in the Preview Color box. For example, if you were selecting a color with the Hue and Saturation color wheel, you would see the current named color shift from name to name (color to color) as you move the mouse pointer over the color wheel. Remember, this is the closest color in the named color list. The current preview color can be added to the named color list by entering a new name, and then pressing the Add button. This will add the color to the list with the specified name and color space values (RGB, CMYK, HSL, etc.). If the find control is not selected, the current name color will only change when a new color is specified or selected using the provided list requester.
§ 23.1.23 - Add
AddThe Add control is used to add new colors to the named colors list. New colors area added to the list by selecting the desired color, entering a name for the color, and then pressing the Add button. The color can be selected with the Hue and Saturation color wheel, or by the manual RGB numeric entry fields to the right of the color wheel. After the color is set, enter an appropriate name for the color. F/x will place the color directly above the currently highlighted named color. F/x will not automatically alphabetize the new named color entry.
If you would like the list to remain alphabetical, you will need to manually select the appropriate location for the new named color. After you have the color set, named, and ready to go into the desired position in the list, press the Add button. This will automatically place the new name and color into the list, and make it the current named color. Remember, clicking on the named color preview box (to the right of the name list) will place the color in the current left color position as well as alter the RGB values to their appropriate settings.
§ 23.1.24 - Remove
RemoveThis control is used to remove colors which are no longer needed. The remove control works by simply selecting the color to remove, and then pressing the Remove button. Once a color is removed from the list it will not appear again unless the color is re-added at a latter time. The remove feature can also be used to remove newly added colors that are in the wrong position in the list. You also have the option of Changing the color instead of removing it.
§ 23.1.25 - Change
ChangeThe Change control is used to change the name or RGB values of the currently selected named color. You have the option to change the name, the color, or both. The first step in changing a named color is to select the color to be changed. If you are going to change the name, but not the color, you must first click on the named color preview color box to the right of the names list. This will place the current named color into the palette color preview. Next, enter the change to be made to the name, and press the Change button. This will replace the old name with the new name, but will not alter the actual color. If you would like to change only the color, do not click on the named color preview color. Instead, alter the color using the Hue and Saturation color wheel, or the manual RGB entry fields. After you have the desired color in the palette color preview , press the Change button.
You can follow the same procedures to change the name and color. The only difference is that after setting the color you will also need to alter the name. Once that is complete, you can select the Change button to alter the color and color name. The changes made to the named colors list will be saved colorset.clr file when the palette is closed.
§ 23.1.26 - Load
LoadThis will load a previously saved palette. The current palette will be eliminated, and F/xx will automatically resize the palette to best fit the newly loaded palette. F/x's palette can load Microsoft Windows Paintbrush palettes, AVI (Video for Windows) palettes, Bitmap palettes, Adobe Color Table (ACT) palettes, and IFF palettes. The palette can also load custom palettes that have been saved using the Save option. Pressing the load button will access a file requester for selecting the desired palette file. Once you have the palette selected, press Ok to load the palette. Remember, once a new palette is selected for loading, the current palette will be lost.
§ 23.1.27 - Save
SaveThis control will save the current palette. The palette will be saved with a .pal extension. Once a palette is saved it can be reloaded using the Load option. After the save button is pressed, a file requester will appear. After you have specified the desired directory, file name, and extension, select Ok. This will save the palette with the specified name and extension. It is possible to load F/x palettes into Video for Windows' Palette Editor. Palettes which exceed 256 colors will be truncated by the Video for Windows Palette Editor.
§ 23.1.28 - Undo
UndoThis selection will undo the last modification made to the palette. This allows you to apply an effect, and then undo the results if they are not to your liking. The undo is available for only the last operation that was performed. For example, if you do a Luma Sort and then a Hue Spread, only the Hue Spread can be undone. You can undo all operations except the changing of the "left color" settings. Pressing Undo a second time will give you back the modified palette.
§ 23.1.29 - Close
CloseThis will close the Palette dialog, and will allow you to use any modifications made to the palette. Remember, the last palette that is visible before closing will be used for all Fill operations, and can be used as the output palette if that option is selected. Once the palette is closed, you can always reopen it by selecting the Set Palette button on one of the Fill operation dialogs.
§ 23.2 - How to Create a Range of Colors
The creation of spreads of color is probably one of the most common tasks you will perform with F/x's palette. The spreads can be used as backgrounds, and for other fill and text fill applications. This example will create a simple blue to red color spread, which could then be used for any number of fills in F/x. First, you will want to set the palette size to 256 colors by clicking on the size button, and then entering 256. If the palette is already 256 colors you may skip the previous step. Next, move the "left color" marker to position 0. This can be done by clicking with the left mouse button in the top left corner, or by entering a 0 in the position control. You will want to place the right color marker in position 255. This can be done by clicking the right mouse button on the final position in the palette (bottom right corner).
Now, we will want to set the last color in the range. Since we want our range to go from blue to red, we will need to set the final color to red. This can be done in one of two ways. The first method is to select a red color using the Hue and Saturation color wheel. The documentation above describes how to select a color by this method. The second way of specifying a color is to enter the values using the provided RGB controls. Once you have a red hue in the color preview box, select Copy. This will place the current left color into the right color position. The next step is to set the blue color for the beginning of the range. You can use one of the two methods above to select a blue color. Once you have the blue color set, press Luma Spread. This will create a luminance based color spread between the specified blue and red.
If you do not want to keep this spread, press Undo. All spreads (Hue and Luma) are created in this manner. You can create multiple color spreads by specifying multiple colors and performing spreads between each. Try applying a Hue Spread (and a Shift Hue Spread) using the colors you have selected. Once you feel comfortable with that, try using some of the advanced tools like Mirror, Repeat, and Merge.
§ 23.3 - Palettes and the Timeline
One of the interesting aspects of F/x's TimeLine is the ability to trend palettes. By simply dragging the operator into the TimeLine with particular palettes selected F/x will smoothly interpolate between palette colors.
, Previous Page . Next Page t TOC i Index o Operators g Glossary
Copyright © 1992-2007 Black Belt Systems ALL RIGHTS RESERVED Under the Pan-American Conventions
WinImages F/x Manual Version 7, Revision 6, Level A
![]()