§ 19.6.8 - Stacking Blend Modes
iToolBox's stacking uses double floating-point resolution per channel to ensure that stacks of very high dynamic range do not cause the stacking engine to clip. Inasmuch as current (as of 2018) DSLR images rarely even reach 14-bits of resolution per pixel, this range, when combined with the f-stop information provided in a typical RAW DSLR image, is sufficient to handle almost any real-world image stacking task.
Several stacking mechanisms are available, all to sub-pixel levels of accuracy sufficient to generate super-resolution images from quality multiple image sources.
§ 19.6.8.1 - Average (Add+Avg) Stack
Each layer in this mode adjacent to other layers in this mode is averaged with the other layers to sub-pixel accuracy.
This layer mode obeys the center operator to facilitate layer rotation, and the layer offset (translation) can also be adjusted using ←, →, ↑, ↓ and home, optionally in combination with control, opt/alt and shift for variations as follows:
- home = X and Y offsets set to zero (layer aligns to upper left)
- shift+home = layer aligns to upper right
- control+home = layer aligns to lower left
- shift+control+home = layer aligns to lower right
- opt/alt+home = layer aligns to center
- opt/alt+←, →, ↑, or ↓ = layer shifts 100 pixels
- shift+←, →, ↑, or ↓ = layer shifts 10 pixels
- ←, →, ↑, or ↓ = layer shifts 1 pixel
- shift+control+←, →, ↑, or ↓ = layer shifts 1/10th of a pixel
This layer mode also has an inherent rotation about that center that is set by using the following keys:
- + (shift+=) - clockwise 1 degree
- _ (shift+-) - counterclockwise 1 degree
- = - clockwise 10th of a degree
- - - counterclockwise 10th of a degree
- 0 - clockwise 100th of a degree
- 9 - counterclockwise 100th of a degree
- 8 - reset rotation to 0 degrees
Use these keys along to change the amount of rotation. These keystrokes must be typed when the layer dialog is active and the layer you want to affect is selected as the current layer.
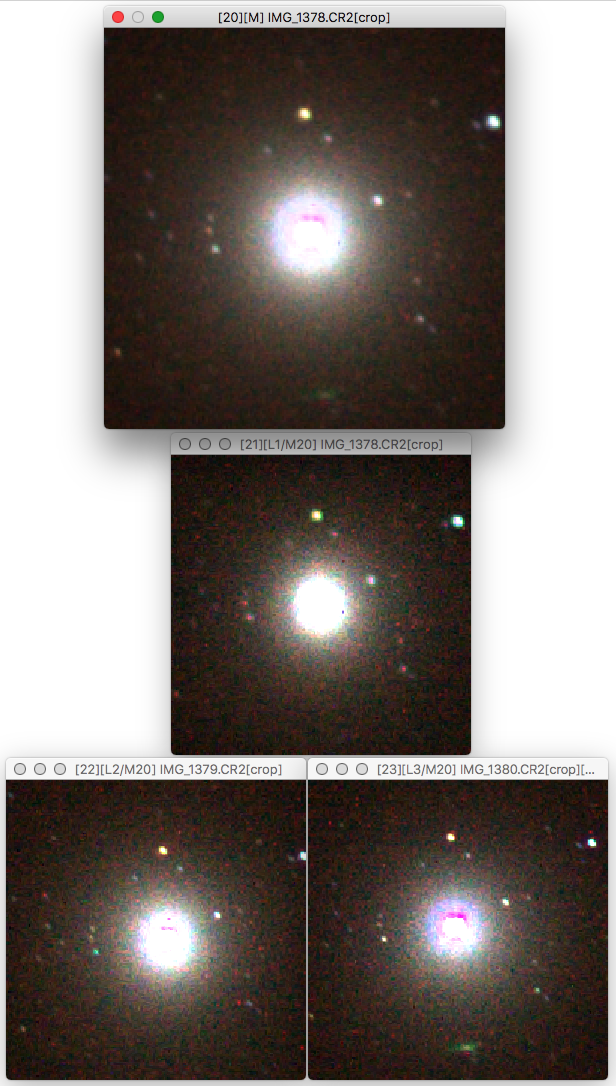
When processing a stack of astrophotos, for instance, the procedure is to:
- Choose a star near the center of the bottom image in the layer stack as the center reference point for all the images; set the image center to this with the center operator. Zoom in this star to get the alignment exactly right. You'll repeat this center point setting for the same star on every layer before you do anything else.
- Translate each of the image layers above to the same center point. It is easiest to do this with just the lower layer turned on, the lower layer set to normal, and the layer you are aligning set to subtract mode. Then, when you get the overlay right, the star at the center point will turn black. You will use ←, →, ↑, and ↓ to translate. Remember to set the center point for each layer using the center operator.
- Zoom in on a corner of the master. Rotate the upper layer using the + and - keys, with shift and/or opt/alt to change the rotation amount, so that the stars in the corner overlap correctly. Note that success here is best achieved when the lens you are using produces a flat, non-distorted image. A wide-angle lens produces extememly distorted results, and so will not align well (or at all.)
- Set all the layers to Add+Avg mode. The result, if you have completed the image alignments properly, will be a lower noise result suitable for further processing.
, Previous Page . Next Page
t TOC i Index k Keyboard o Operators g Glossary c Changes
![]()
on February 27th, 2026 at 17:38 MT
| Please consider supporting my iToolBox development efforts with a small PayPal donation. |