| This is a child page. You can use Parent in the quick nav bar at the top or the bottom of the page to navigate directly back to the parent of this page. Some child pages are more than one level deep, and in that case will require more than one Parent click to reach the outermost document level. |
§ 25.3 - Motion Blur Tutorial
The Motion Blur operation allows you to create a blurred effect in a particular direction. This effect is useful in depicting motion in a series of still images, or it can be used to enhance the idea of movement in an animation. This tutorial will cover the basic use of the Motion Blur operation and its controls. Before starting this tutorial, you should read the Motion Blur operation section in this manual. This will help you to understand some of the basic terminology and the way the effect actually operates. If you have not read this section do so now.
§ 25.3.1 - Tutorial steps
-
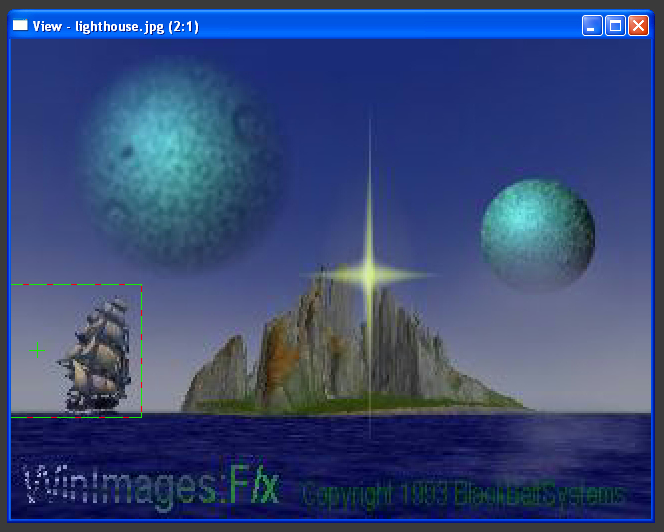
This tutorial will use one of the images provided on the CDROM. This image is called LIGHT.JPG The image can be loaded using the Load Image... option in the File pull down menu. After you have selected this option, use the file requester to select the proper directory and file to be loaded. Once the image has loaded, you will see an image which shows a ship near an island with two "moons" above in the sky.
We will use the Motion Blur on this still image to make the ship appear as though it is moving slowly, and then rapidly, to the right.
-
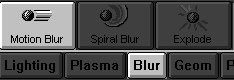
The next step is to select the Motion Blur operation. This can be done in one of two ways. You could select Toolbar's Blur group, and then the Motion Blur icon from the Verse Bar. This will access the Motion Blur dialog for use:
You also have the option of selecting the Motion Blur option from the Blur Group area in the Operations pull down menu. The Motion Blur dialog consists of three controls used to specify the length, direction, and the amount of the Motion Blur effect. The Length control allows you to specify an actual length for the Motion Blur effect. This length is measured as a percentage of the entire area selection. For example, a setting of 100% would result in a Motion Blur that is the entire length of the area select for each pixel in the region. So, if the area select was 20 pixels across, the Motion Blur for each pixel would be 20 pixels in the specified direction. Increasing this value will give you more Motion Blur, and a decrease will give you less Motion Blur.
The Direction Control allows you to specify the actual direction of the Motion Blur. This means that Motion Blur can occur in any direction that you wish, not just left, right, up, or down. The direction is specified as an angle value that can range between 0 and 360 degrees, with 0 and 360 being an upwards blur. The angle is measured clockwise from vertical. This means that 90 degrees is a Motion Blur to the right, 180 is a Motion Blur down, and so on.
The final control is the Amount specification. The amount slider allows you to set a percentage value for the overall application of the effect. For example, a setting off 50% would give you half of the total Motion Blur available to you. A setting of 100% is the maximum value, and will achieve the largest amount of the Motion Blur effect.
-
Now that you are a little more familiar with the controls, let's apply some Motion Blur to the LIGHT.JPG image. For this example, you will want to select the Rectangle Area Selection Mode. This is located in the first column, second row of the Toolbox. This allows you to select rectangular regions using the left mouse button for sizing, and the right mouse button for positioning. Place the Rectangle so that it is the height of the ship, and covers from the front of the ship to off of the left side of the actual image:
Placing a portion of the area selection off of the image will increase the effective area select, and will create a nicer effect. If you have not altered the default Motion Blur settings, the Motion Blur should occur straight up, and have a length of 50.
Since we want to create the idea of motion to the right, the Motion Blur should occur to the left of the image.
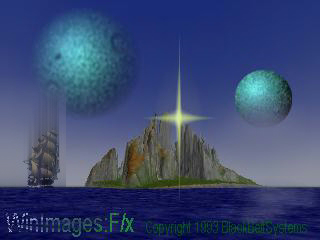
As you know, the direction control measures angles clockwise from vertical, therefore a Motion Blur to the left would be at 270 degrees. Set the Degrees control to read 270 degrees at this time. You will also want to select the Undo button to eliminate the unwanted test blur, and then select the Redo button in the Toolbox to preserve the last area selection that was made. You will also need to alter the Length and Amount controls to read 35 and 45 respectively. These settings will produce a Motion Blur which is directly to the left, 35% of the area select in length, and applies about 45% of the total Motion Blur possible. Once you have set the sliders to the correct position, simply click on the LIGHT.JPG image to apply the effect. Notice that this creates a very subtle Motion Blur effect, which may give you the impression that the ship is moving to the right.
-
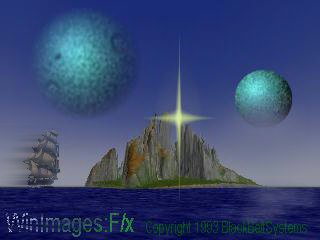
Now that we have created a subtle Motion Blur, let's create a more dramatic effect. Begin by pressing the Undo button to erase the last Motion Blur. Now, set the Length to 75, and the Amount to 85. The overall effect should be a longer blur that is even more "blurry" than the previous example. You can apply this effect by simply clicking on the image. After generation is complete, you should have a more dramatic blur effect on the ship:
You get the impression that the ship is moving rapidly to the right. You should undo this application, and continue to apply various Length, Direction, and Amount settings until you feel comfortable with the effect. This tutorial will not cover the use of a Motion Blur in an animation sequence. The Motion Blur operation is useful for making moving objects appear more realistic. You can use the same concepts presented in the Asterize tutorial to create a Motion Blur animation.


, Previous Page . Next Page t TOC i Index o Operators g Glossary
Copyright © 1992-2007 Black Belt Systems ALL RIGHTS RESERVED Under the Pan-American Conventions
WinImages F/x Manual Version 7, Revision 6, Level A
![]()