| This is a child page. You can use Parent in the quick nav bar at the top or the bottom of the page to navigate directly back to the parent of this page. Some child pages are more than one level deep, and in that case will require more than one Parent click to reach the outermost document level. |
§ 16.144 - Stabilize
| Quick Reference to Scripting Command |
|
a=STABILIZE(Poi X, Poi Y, Disp x, Disp y, EDGES_SETTING, red, green, blue, alpha, TILE=0 or STRETCH=1)
EDGES_SETTING must be 0 |
| Items in CAPS are 0/1 or ranges with more options than just 0/1. Ranges other than 0/1 are indicated by brackets, such as [0-2]. |

Stabilize is an operation made only for animated sequences. It works as follows:
-
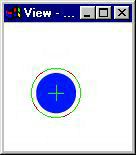
Load the animation that you want to correct into the timeline as the action image. In this example, we will use the following animation:

-
Select the point of interest and the displacement:
 a. Select "Gather Both" from the dialog, select the object of interest with the elliptical area selection. The center crosshair of the ellipse is the precise point of interest. Any frame can be shown by holding the control key and clicking the frame of choice along the action image line. Drag the operator into middle of the TimeLine.
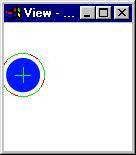 b. Select "Gather Displacement Points" from the dialog, choose the first frame. Select the item of interest with the area selection. Drag the operator into the beginning of the timeline.
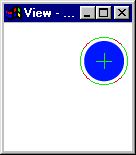 c. Make sure "Gather Displacement Points" is still selected in the dialog, choose the last frame. Select the item of interest with the area selection. Drag the operator into the end of the TimeLine.
 - Note that the item of interest moves in two directions during the animation, thus we consider 3 points in the timeline. You may need more points or simply two points. The idea is, choosing the frame that is most centered in the animation will track more smoothly. This animation moves a great deal, and is not the kind of animation for which this operator was built. This example was used to exaggerate and clarify how the operator works. Knowing this, generate the new animation.
-
Now, the blue dot always stays centered in the animation. You have several options for the areas where the original animation doesn't extend including a solid color like the gray seen in the final animation or a texture image (more below).

§ 16.144.1 - Stabilize Controls
§ 16.144.1.1 - Gathering Options
This gives you the option of choosing what criteria will be set by the area selection. This operator was made so that the center crosshairs of the ellipse will be the point selected. This allows you to decide if the point selected is a point of interest, a displacement point, or both. The first selection should be the point on the image that you wish to stabilize. This point will be both displacement and the point of interest. Note that this may not be the first frame, as in the example we have shown above. Successive selections should be points of displacement so that the same point of interest is kept throughout.
§ 16.144.1.2 - Point of Interest
This shows you the point that will be tracked by the operator. This can be altered by hand, but can be set automatically by the area selection.
§ 16.144.1.3 - Displacement
This shows you the location to which the point of interest has moved. This can be altered by hand, but can be set automatically by the area selection.
§ 16.144.1.4 - Edges
When a frame is moved in order to be stabilized, it is moved in one direction or another. This causes a gap between the image and an edge. The Edges control gives you the option of filling the gap with a solid color or a texture image. (more below)
§ 16.144.1.5 - Solid Color
Choosing this will allow you to set the red, green, blue and alpha of the color you wish to fill the gap.
§ 16.144.1.6 - Texture
First, you must choose an image to act as the texture. This works ideally by simply choosing the texture as the source image in the TimeLine. You can also choose the texture by choosing it in the drop-down box if it's already loaded into F/x or clicking the load source button and dragging the operator into the TimeLine. Then you choose if the texture will be stretched to fit the animation, or if it will tile across the background of the animation before it is dragged into the TimeLine.
, Previous Page . Next Page t TOC i Index o Operators g Glossary
Copyright © 1992-2007 Black Belt Systems ALL RIGHTS RESERVED Under the Pan-American Conventions
WinImages F/x Manual Version 7, Revision 6, Level A
![]()