| This is a child page. You can use Parent in the quick nav bar at the top or the bottom of the page to navigate directly back to the parent of this page. Some child pages are more than one level deep, and in that case will require more than one Parent click to reach the outermost document level. |
§ 15.21 - The Color Key Modifier
The Color Keyed area selection modifier allows you to select sub-regions in a selected area based upon the HSV, RGB, Colorspace, Steepness or Height values of the color you initially select using the area sampled.
This modifier requires the use of an area selection mode such as entire or rectangle. The keyed selection is also based upon a variance that is set by you. A large variance means that a greater number of colors will be selected in the Area Selection.
This tool differs from the Color Wand tool because the areas selected using the Color Keyed modifier can be discontinuous areas in the image, wheras the colors selected by the wand must be connected to one another, or in other words, they must be adjacent to each other.
§ 15.21.1 - Step by Step Use of the Color Keyed Area Selection Tool
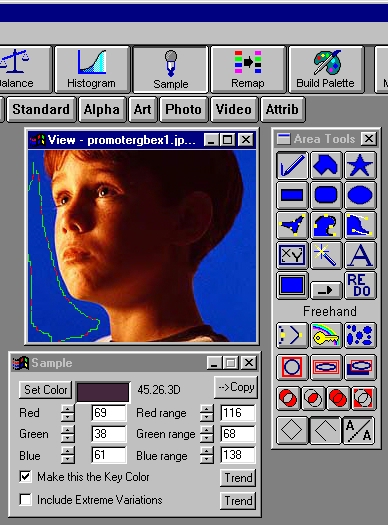
- Select the Color Sample tool from the Standard Adjustments group, and an area selection tool (i.e., Rectangle).
-
Use an area selection tool (like freehand or rectangle) to sample the color that you wish to key on.
 Note:
Note: Make sure that the Make This the Key Color option is selected.
The Color Sample dialog will then adjust its RGB and variance sliders to match the sampled color. In some cases you will be keying on a specific color in the area selection. In these cases you can access the Color Key Control dialog from the Area menu or by right clicking over the Color Key icon. This dialog allows you to specify a color and a specific variance for the key color.
-
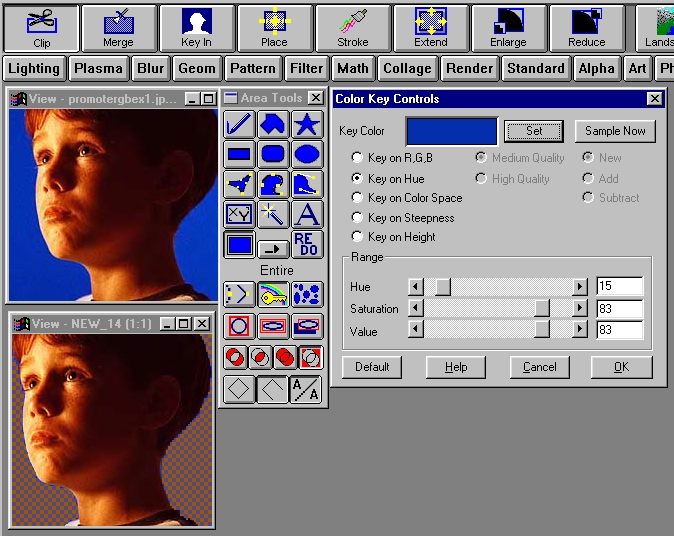
Select the Key Color... option in the Area menu or right click on the Color Key icon in the tool box. The color that was sampled will now appear at the top of the Color Key Control dialog. You will now want to edit this color by selecting the Set button, or accept the color by doing nothing. You will also want to select a color space (RGB or HSL) and a variance setting. After you have made these adjustments, select OK to confirm the color selection and variance values.
The Color Keyed region is now ready to be selected. This is done by selecting the Color Keyed area selection modifier, selecting the desired area selection mode (entire, rectangle, etc.), specifying the parameters for the desired operation, and then simply drawing the desired area on the image using that area modes specific controls. WinImages F/x will then create an area selection mask based on the selected region (boundary), selected color, color space (RGB or HSL), and the specified variance. The area can be fine tuned by altering the variance to increase or decrease the selected area.

This area selection mode can be used in conjunction with the Union modifier to create multiple color keyed area selections. For example, you would like to create a mask that contains all of the Blue and Magenta in the image. This is done by first keying on the blue using the Entire area selection mode and the Color Key modifier set to a key color of Cyan. Next, you would need to select the Union modifier, and reset the Key Color controls to the desired Magenta color. The area select will be completed when you click on the image. The mask that is created will contain all of the Blue and Magenta from every portion of the image. Creating masks based on a single or multiple colors is sometimes called Blue Screening instead of Color Keying. This comes from the use of "Blue Screens" (or "Green Screens") as color keys in video for creating effects like a space craft moving through a star field or the projection of weather maps for the evening news.
Keying on Color Space is handled differently from the RGB and HSV keying modes. This method creates a color space based on the color that is specified by the user by pressing the Set button (for a specific color value), or by selecting the Sample Now option. Pressing the Sample Now button allows you to select from an image the colors you wish to key on. Once the key space is specified, you can then key on the colors in that space. The major difference between this type of keying and range based keying is the accuracy of the color key. With range based keying you can key on colors that you did not want to key on due to their RGB values. With space keying you will only be keying on the colors you specify.
Another nice option related to space keying is the ability to add or remove a color/colors from the key space. You also have the option of expanding or contracting the key space based on the existing key space. This means that if your key space is made up of blues, you can increase the number of blues selected by the space by simply expanding the color space.
Each control in the dialog is described below in greater detail:
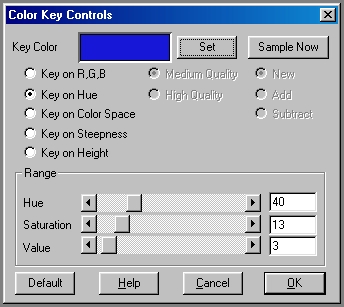
§ 15.21.1.1 - Key on: RGB, Hue, or Color Space:
This control allows you to select the color key method that you will be using for the key selection. You may select an RGB based key, and Hue based key, or a color space key. By selecting any of these options the dialog will automatically change the controls to the proper settings for that key mode. Please review the documentation for further information on how color keying works for each of the methods.
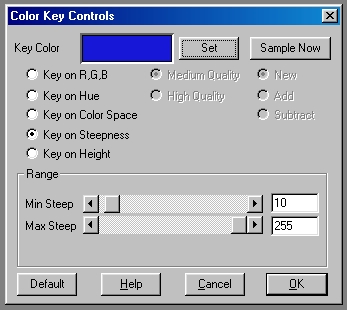
§ 15.21.1.2 - Key on: Steepness or Height:
These settings provide a means of area selection that is designed to provide a strong tool for working with heightfields.
Heightfields are used to generate terrain images. F/x's Landscape operator uses heightfields, and the Texture Generator can create them. Since a heightfield is essentially just a grayscale image, you can apply any effect within F/x to them for some very interesting results.
When either option is selected, you will have additional controls available to adjust the range that the mode is sensitive to.
For instance, in the image below, the steepness controls are set to be sensitive to ranges from 10 to 255. This means that more gentle slopes will not be selected by the key. This allows you to apply effects only to the plains, for instance. So you might smooth the plains with a blur, while not affecting steeper areas, which would naturally be rougher in the real world.
With Height, the controls are similar, and so are the uses. You can apply effects only to certain ranges of altitude. An example of this might be where the water level is set to 32, and you set the key to 0-32. You could then smooth or roughen only areas that are underwater. You could "raise" the land under the water (and only that) by applying brightness with this key. Using the reverse, you could apply effects to only regions that were above the water level.
§ 15.21.1.3 - Medium/High Quality:
This control alters the quality of the color key space. A medium quality space will produce fairly good results with low memory usage, and a high quality space will produce excellent results with higher memory requirements. Remember, it is possible to alter from one quality of key space to the other, but their will be some minor reduction in quality the more times you switch quality to quality. These options are only available of the Key on Color Space option is selected.
§ 15.21.1.4 - New/Add/Subtract:
These controls allow you to specify how the next sample area will be used by the key color space. You can select to Add the new colors to the current color space, subtract the new colors from the existing space, or create a new color space. These options are only available if the Key on Color Space option is selected.
§ 15.21.1.5 - RGB/HSV Range:
These two sets of slider gadgets allow you to specify the specific RGB or HSV ranges for a RGB or Hue based color key. Please review the above documentation and the documentation in Color Key section for further details on how color ranges influence a color key area selection. These options are only available if the Key on RGB or Key on Hue selection has been made.
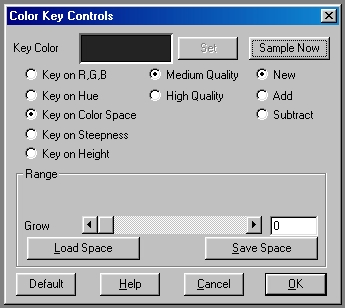
§ 15.21.1.6 - Grow:
The Grow slider allows you to increase the range of a color within the key color space. For example, if you have a key space comprised entirely of pure blue (0,0,255) and you grow the color space by 10, your new space would include colors from (0,0,255) to (10,10,245). It is important to remember to reset this control to 0 if you are going to make further adjustments to the color space. If you do not, the program will continue to grow the color space by the specified value each time it is used. This option is only available if the Key on Color Space option is selected.
§ 15.21.1.7 - Load/Save Space:
These controls allow you to load or save a color space to file. Once the color space has been saved, it can be recalled and used by selecting the load space button in this dialog.
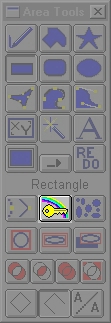
See Also: Area Tools
, Previous Page . Next Page t TOC i Index o Operators g Glossary
Copyright © 1992-2007 Black Belt Systems ALL RIGHTS RESERVED Under the Pan-American Conventions
WinImages F/x Manual Version 7, Revision 6, Level A
![]()