| This is a child page. You can use Parent in the quick nav bar at the top or the bottom of the page to navigate directly back to the parent of this page. Some child pages are more than one level deep, and in that case will require more than one Parent click to reach the outermost document level. |
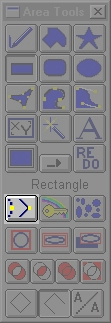
§ 15.20 - Re-Edit the Last Area Selection
The Edit modifier allows you to alter the previous area select with the same area selection mode, or even with an alternate area selection method. This means, for instance, that an elliptical area select could be edited with the rectangular area selection mode. You cannot edit the Color Wand, Color Keyed, Numeric Rectangle, or Entire Image area selection modes. All of the other modes can be edited by using the original area selection method, or by using one of the other acceptable area selection modes.
The area select is edited by selecting the tool that you are going to edit with and then the Edit button in the Area Selection Tool Box. After doing this, simply click in the view that is to be edited with the left mouse button. This will activate the edit tool. You will be presented with a series of control boxes that will appear on the corners, and in the center of original area select.
The Polygon, Polyarc, Bezier Curve, and Spline tools are special in that they will have a control box for every point that was specified in the original area select.
The control boxes and the right mouse button can then be used to size the area select to the desired dimensions. Each area select will also contain a center control box for altering the relative position of the area select. Once the area select is in the proper position and the desired shape, press the left mouse button. Doing this will execute the current operation in the newly edited area select.
Any editable area select can be edited using any of the other accepted area selection methods. This will give you great control over the areas that effects are to be applied to. You can also edit an area select in another view by following the above steps.
If you are using the Draw First Method, then the control handles will appear around the selected region immediately.
See Also: Area Tools
, Previous Page . Next Page t TOC i Index o Operators g Glossary
Copyright © 1992-2007 Black Belt Systems ALL RIGHTS RESERVED Under the Pan-American Conventions
WinImages F/x Manual Version 7, Revision 6, Level A
![]()