| This is a child page. You can use Parent in the quick nav bar at the top or the bottom of the page to navigate directly back to the parent of this page. Some child pages are more than one level deep, and in that case will require more than one Parent click to reach the outermost document level. |
§ 16.96.20 - Scripting Examples
§ 16.96.20.1 - Simple Random Asterizations
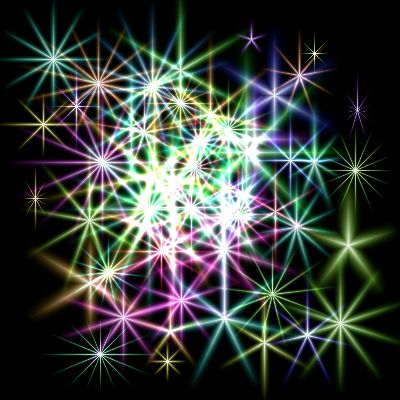
This script allows you to create asterizations in unpredictable colors all over the colorspace.
§ 16.96.20.2 - Saturated Random Asterizations
This script creates only colors that exist around the outer edge of the color wheel; that is, they are always fully saturated colors.
§ 16.96.20.3 - Image Negative Operator — Written entirely in the WIS scripting language
If you look this script over, you'll see it is processing every pixel in a rectangle described by X1, Y1, X2 and Y2, values it retrieves from WinImages F/x. But in the example image, the effect is round; what's going on?
The answer is easy: When you make your area selection, F/x creates a mask that limits the application of changes to the selected area. Technically speaking, this means that although you process the entire rectangle that contains the area selection, F/x prevents your changes from being applied anywhere outside the actual selection shape, which is often not rectangular at all.
This very simple mechanism allows you to concentrate on figuring out more generally what you want to do to the image pixels, while F/x takes care of almost all the area selection issues for you; all you need to do with regard to area selections is process a rectangle exactly as we show you here.
If antialiasing and/or transparency is in use, then portions of the area selection will be "soft" in some places, and the pixel information you send to F/x will be mixed with the original image information according to how soft the area selection mask is.
You can (and should!) use the image negative example here to create other image operations.
F/x does not use the mask to limit the pixel information you can read from the image, so you can write image processes that use pixel information outside the masked area to make computations.
Some scripts require access to an unchanged copy of the image in order to read information surrounding the pixel to be processed; if you fetch the surrounding pixels from the image you are changing, early changes affect later computations. Many filters are subject to this processing issue.
This task is easily addressed in the .WIS scripting language. When the user makes an area selection and the Scripting operator is the one in use, F/x will take a complete copy of the image and place it in the undo buffer before it calls your script. You can then use the GETREDU(), GETGREENU(), GETBLUEU() and GETALPHAU() functions to retrieve the original, unchanged image data from the undo buffer all during the time you are changing the actual image. Problem solved!
Here's a second example; this one uses the get and put hue functions to make the image greener. Otherwise, it is essentially the same as the negative example.
§ 16.96.20.4 - How to process a Palette
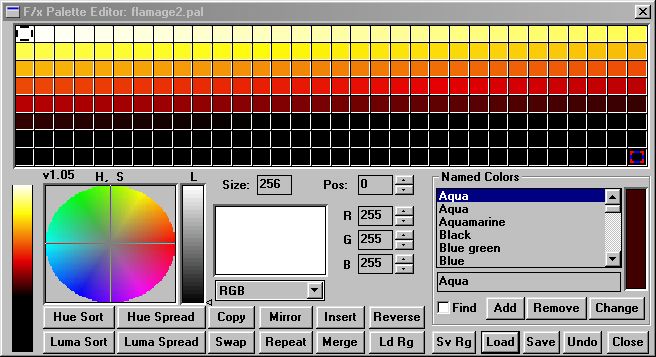
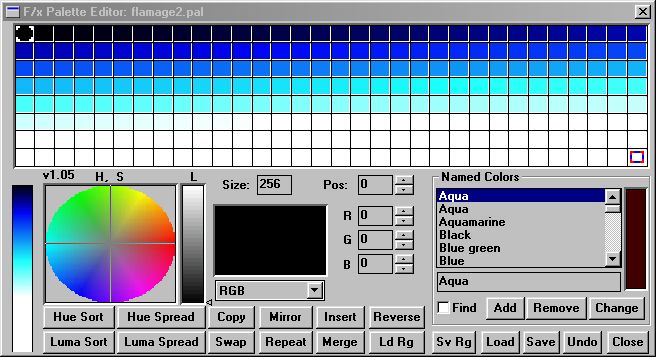
or, more compactly...
§ 16.96.20.5 - How to process a Palette, reprised
§ 16.96.20.6 - How to process a Profile
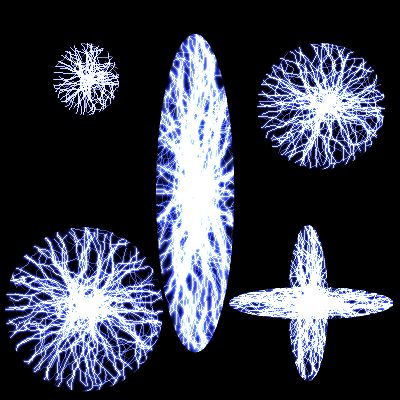
§ 16.96.20.7 - Multi-bolt Lightning Effect
This one is simple, but uses a little trick. You'll see that we're creating an angle that steps from 0 to 350; that accounts for the lightning bolt going across the selection at all angles. But we're passing in the angle (A) as the random number seed too — what that does is ensures that each bolt is different from the others. We don't go to 360, because rotationally speaking, 360 is the same as 0 and that means we'd shoot a bolt twice at the same place.
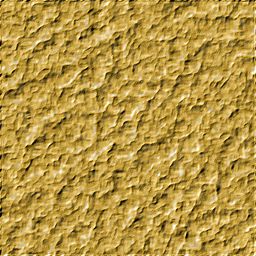
§ 16.96.20.8 - Gold Foil
 |
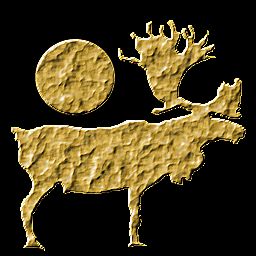 |
This script will create a gold foil texture.
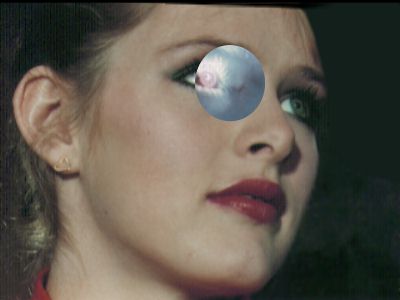
§ 16.96.20.9 - Camera Flare

Camera Flare Script Results
This is a great example of a more advanced script. This uses annular rings and an asterism to produce a very convincing "camera flare" effect. The effect follows a freehand area selection from the start point to the end point, and so can be made to track with bright spots and camera angles just as a real flare does - as shown in the example animation above.
§ 16.96.20.10 - Setting Profiles via Scripting
The following examples will give you some "boilerplate" you can use in your own scripts.
1/2 upwards curve
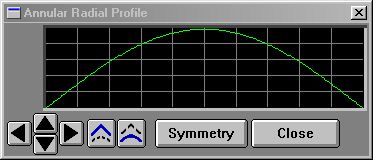 10 p$ = "annular"
20 pi = 3.141592653979382
30 for i=0 to 200
40 j = i/200
50 v = sin(j*pi)*255
60 a = SETPROF(p$,i,v)
70 next i
You'll find the names for all the system profiles located here. |
Full sinewave
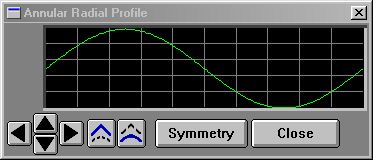 10 p$ = "annular"
20 pi = 3.141592653979382
30 for i=0 to 200
40 j = (i/200)*2
50 v = ((1+sin(j*pi))/2)*255
60 a = SETPROF(p$,i,v)
70 next i
You'll find the names for all the system profiles located here. |
Upwards Ramp
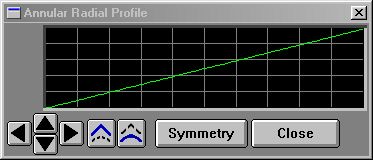 10 p$ = "annular"
20 for i=0 to 200
30 j = (i/200)
40 v = j*255
50 a = SETPROF(p$,i,v)
60 next i
You'll find the names for all the system profiles located here. |
Downwards Ramp
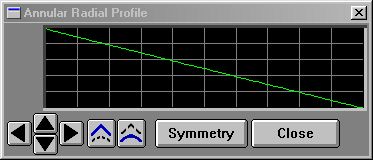 10 p$ = "annular"
20 for i=0 to 200
30 j = (i/200)
40 v = (1-j)*255
50 a = SETPROF(p$,i,v)
60 next i
You'll find the names for all the system profiles located here. |
Multiple Cycles of Sinewave (5)
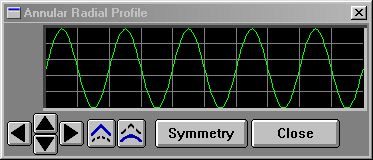 10 p$ = "annular"
20 pi = 3.141592653979382
30 for i=0 to 200
40 j = (i/200)*2
50 v = ((1+sin(j*pi*5))/2)*255
60 a = SETPROF(p$,i,v)
70 next i
You'll find the names for all the system profiles located here. |
Using STEP() to obtain square waves
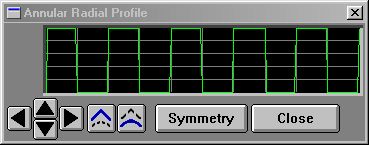 10 p$ = "annular"
20 pi = 3.141592653979382
30 for i=0 to 200
40 j = (i/200)*2
50 v = STEP((1+sin(j*pi*5))/2,.5)*255
60 a = SETPROF(p$,i,v)
70 next i
This example feeds the portion of the sinewave formula that results in a sine wave of 0 to 1 to the STEP() function, with crossing parameter of .5. That produces a result of 0 below .5, 1 above .5. You'll find the names for all the system profiles located here. |
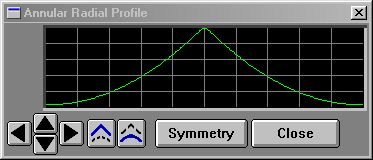
Using SMOOTHSTEP() to obtain squarish waves
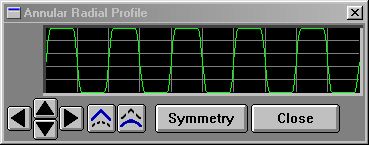 10 p$ = "annular"
20 pi = 3.141592653979382
30 for i=0 to 200
40 j = (i/200)*2
50 v = SMOOTHSTEP((1+sin(j*pi*5))/2,.3,.7)*255
60 a = SETPROF(p$,i,v)
70 next i
This example feeds the portion of the sinewave formula that results in a sine wave of 0 to 1 to the SMOOTHSTEP() function, with edge parameters of .3 and .7. That produces a result of 0 below .3, 1 above .7, and a smoothly changing value between the two. This can help you avoid the harsh edges produced by the STEP() function if it is too fierce for you. You'll find the names for all the system profiles located here. |
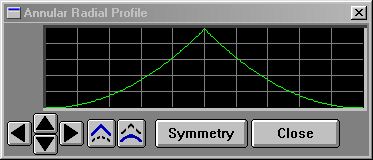
Using CLAMP() to limit excursions
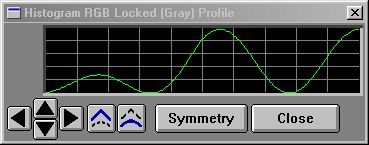 200 REM makes sine wave cycles
210 c = 2.25
220 p$ = "histo"
230 pi = 3.141592653979382
240 for i=0 to 200
250 j = (i/200)*2
260 v = ((1+sin(j*pi*c))/2)*255
270 a = SETPROF(p$,i,v)
280 next i
290 return
300 REM rampulates from 0-1 by 1/2 profile distance
310 p$="histo"
320 for i=0 to 200
340 a=SETPROF(p$,i,GETPROF(p$,i)*CLAMP((i/200)*2,0,1))
350 next i
360 return
The example image above shows what happens if you call the subroutines at 200, then at 300. The first subroutine produces a 2.25 cycle sine wave of full amplitude. The second reads that back from the profile, then multiplies each profile value by a ramp that would go linearly from 0-2 over the length of the profile ((i/200)*2) except it was fed to CLAMP() with limits of 0 and 1. So what happens is that when the ramp hits 1, it stays there, period. So the sine wave goes from 0 to full amplitude from the begining to 1/2 the profile, and after that it just stays at full amplitude. This example was taken from a metallic texture generating script that remaps linear brightness into a semblance of metallic reflections. You'll find the names for all the system profiles located here. |
F/x has a series of useful scripting functions you can use to control waveforms. They are:
- CEIL()
- FLOOR()
- MIN()
- MAX()
- HILIM()
- LOWLIM()
- CLAMP()
- STEP()
- SMOOTHSTEP()
- ABS()
If you want to be a profile wizard, you'll want to look into all of these!
, Previous Page . Next Page t TOC i Index o Operators g Glossary
Copyright © 1992-2007 Black Belt Systems ALL RIGHTS RESERVED Under the Pan-American Conventions
WinImages F/x Manual Version 7, Revision 6, Level A
![]()