| This is a child page. You can use Parent in the quick nav bar at the top or the bottom of the page to navigate directly back to the parent of this page. Some child pages are more than one level deep, and in that case will require more than one Parent click to reach the outermost document level. |
§ 13.2 - Data Representation and Manipulation
§ 13.2.1 - Data Representation and Manipulation
F/x handles many types of data, depending on what it is you're working on. Each type has benefits, limitations and specific applications. It is very useful to have a working understanding of what these types are, what they are for, and so where they will naturally come into play in your working strategies.
§ 13.2.2 - Image Data
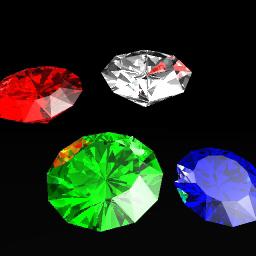
§ 13.2.2.1 - 24-bit
A 24-bit image (also known as an RGB image) is made up of red, green and blue data for each pixel. These three color components combine to make 16 million color possibilities. You can also user layer modes to indirectly, but accurately, represent CMY and CMYK data.
§ 13.2.2.2 - 32-bit
A 32-bit image or layer (also known as an RGBA image or layer) has red, green and blue components, and adds an alpha component that allows you to control the transparency of each pixel in an image or layer independently. All layers are 32-bit RGBA layers.
§ 13.2.3 - Ancillary Image Data
Within F/x, images and layers can carry various types of additional information which may be viewed and/or manipulated with F/x. This would include DPI and aspect ratio control information, text annotations such as the name of author or artist who created the image, notes, copyright information, and so forth. Tools are available for manipulating this information (at the far right end of the main toolbar, marked Attrib), but not all file formats support saving all types of information, so keep this in mind when you're intending to work with any type of auxillary information.
§ 13.2.4 - Promotion of Lesser Bit Depths and Maps
When you load an image that has less resolution per pixel than 24 bits, F/x will promote it to 24-bits, or 32-bits if there is transparency in the image format. For instance, 8-bit GIF images may contain rudimentary transparency information, and if so, F/x will transfer that information to the alpha channel for that image when it is loaded.
§ 13.2.5 - Demotion of Higher Bit Depths and Maps
When you save an image to an image file format that has less capabilty to represent the full 24- or 32-bits of image data in an image or a layer of an image, then in most cases, that information is lost although F/x makes an effort to represent the image in the best quality possible. You should always try to be aware of the limitations of any particular file format when you save an image in it; you don't want a nasty surprise... such as finding there is no longer any transparency information because you saved in BMP image format, when you worked for a long time to get the transparency just right! If you're in any doubt, save atomic images in TRM format; this saves all data and characteristics for any atomic image.
§ 13.2.6 - Image Properties
You can learn about various image properties, such as resolution, number of colors, names and so forth, by using the Image Information and Change Image Info commands in the Window menu.
§ 13.2.7 - Image Roles
Within F/x, images can take on various useful roles. They include the following:
§ 13.2.7.1 - Action Images
An action image is an image that is affected - it's data changes - as a result of an action you perform. Generally speaking, it's one you have performed an area selection in.
§ 13.2.7.2 - Source Images
A source image is an image that serves as the source for pixel data that is being combined into another image. The source image is not affected by this, it only serves as a source for information. The action image is the one that is affected by the incoming source image data. Operators that use source images will have a "drop-down" list of available images that allows you to select the source from all loaded images. Or, you can drop the context menu (from the upper left corner) from any image view and select Assign as Source and that image will become the source image.
§ 13.2.7.3 - Brush Images
A brush image is an image that serves as the paintbrush tip for pixel data that is being combined into another image using the special Stroke operator. The brush image is not affected by this, it only serves as a brush tip containing information to be transferred to the action image. The action image is the one that is affected by the incoming brush image data. Brush images can change in a lively fashion if they are treated as barrels. Image barrels are essentially layered images - the stroke operator can sequence through the layers in a layered image randomly or in order to change the paintbrush "tip" during a brush stroke. More details on image barrels may be found Here. Operators that use brush images will have a "drop-down" list of available images that allows you to select the brush from all loaded images. Or, you can drop the context menu (from the upper left corner) from any image view and select Assign as Brush and that image will become the source image.
§ 13.2.7.4 - Other image roles
The Ray Trace Operator can use loaded images in several other roles; as images that map onto 3-d objects (this is "image mapping"), as images that control the apparent "bumpiness" of a 3-d object (this is "bump-mapping"), and as images that control decisions for choosing between different types of computed texture mapping (this is "decision mapping.") None of these roles cause the image data to be changed; in all cases, the images are used as information sources only. However, they are not assigned the role of the source image within the program.
§ 13.2.7.5 - Unassigned Images
In addition to images and/or layers that have particular roles, there may also be one or more images that are loaded that have no assigned role at all. These images take up memory and display card resources, and so you may want to consider unloading them if that is reasonable to do.
§ 13.2.8 - Alpha Channels
As discussed previously, images can contain 8-bits of transparency information per pixel. All of these "alpha pixels" together are referred to as the "alpha channel." Similarly, all of the red pixel information in an image is referred to as the red channel, and so on for green and blue pixel information.
Embedded TransparencyThe alpha information that is stored within an atomic 32-bit image or an image layer is referred to as the image or layer's embedded transparency information. This transparency information is carried around with the image, and is integral to it. Whenever that image is used as a source image for an operation, transparent areas will not affect the action image. You can work directly with the alpha channel information using the tools in the Alpha portion of the toolbar.
§ 13.2.9 - Area Selection Transparency
In addition to the embedded transparency, you can cause area selections you make to have an automatically generated transparency. Control of this feature is obtained by using the Transparency Controls command in the Area menu. Area selection transparency can combine with an image's embedded transparency to generate a new resulting transparency; it can also be used to limit the extent of most effects. You can control some of this by switching the Mask With Target Alpha command in the Area menu.
§ 13.2.9.1 - Pixel Transfer Modes
Pixel transfer modes affect operators that place new color on an image. Operators of this type include the color fill operator, brushstroke operator, merge and place, and texture. These operators, generally speaking, are those that you would use to create new artwork, as opposed to operators that affect already existing pixels.
There are many pixel transfer modes, you will find them completely documented here.
§ 13.2.10 - Atomic Images
You can change an atomic image's RGB or RGBA data, it's size, and any ancillary information associated with it. You can also "promote" it to a newly layered image, or import it as a new layer in an already existing layered image.
§ 13.2.11 - Layered Images
Layered images offer a great deal more flexibility and power than do atomic images. About the only thing you really can't do with an image that is serving as a layer in a layered image is use it as a layer in a different layered image, unless you "detach" it so it becomes an atomic image again, first. Layered images are described in detail here.
§ 13.2.11.1 - Controls and Options
In order to control a layered image, you can select the Layer command from the menu available from the top left corner from any layer or master view of the layered image. You can also press the "L" key if any view on a layer or master of that layered image is active.
§ 13.2.11.2 - Blend Modes
Much of the flexibility of layered images comes from the ability to combine one layer with other layers in various different ways. Blending modes are the means to do this; they are selected in the layer control dialog, available as described just previously.
§ 13.2.11.3 - 77 Mode Types
As of F/x R7.5, there are seventy seven different layer blending modes. These may be considered in three separate groups, although many "straddle" the definitions by affecting more than one type of information. All of the blend modes are described here.
§ 13.2.11.4 - Color Processing
Color processing layer modes directly affect the color of the pixels in the master image by affecting the colors of the layers below them, or replacing the colors of the layers below them.
§ 13.2.11.5 - Alpha Processing
Alpha processing layer modes affect the which pixels "show through" on the master image by affecting the transparency of the layers below them. To some degree, most layer modes are alpha processing modes - if the alpha channel for that particular layer is not completely opaque, most layer modes are reduced in affect. But there are layer modes that do nothing else but affect the transparency of layer groups beneath them; these are also known as masking modes.
§ 13.2.11.6 - Geometry Processing
Geometry processing modes affect the position of image data in layers below them. This is extremely useful in creating realistic water, highlights and more. Only Warp Layers work in the geometry processing domain; they do not contain transparency information. However, when a warp layer moves pixel data so far that the source for a pixel would be off the image, the effect causes no information to be transferred, and this is the same end-effect that a transparent pixel would cause in other layer modes. This can be utilized for clever effects in some cases.
§ 13.2.11.7 - Local Layers
Local layers are groups of layers that affect each other according to the various layer modes selected, before that sum of effects is applied to the layers below. For instance, you might want to use a text string to "cut out" a colorful texture, and then apply the resulting colorfully textured letter shapes to the image layers below; that's exactly what local layers allow you to do.
§ 13.2.11.8 - Layer Effects
In some cases, you can produce the same, or similar, effects using layers as you can using processed effects from the operations toolbar. The benefit of doing this is that generally speaking, the effects can be undone or modified at a later time, while once an actual operation has been applied to an image or a layer, it may only be undone as long as the undo history for the current working session is still intact. Examples of this are embossing, punching, shadowing and glowing, as well as rotation, scaling and all the other geometric effects possible using warp layers.
§ 13.2.11.9 - Flattening Never Required
Because layered images within F/x always have an additional image view (called the "master image") available which contains the completely flattened image, you can always save that image in an atomic image file format, or use the Clone command in the menu to duplicate it for other use within F/x. There is no need to "flatten", or actually destroy, the layered image information at any time. In cases where you want a flat image, simply use the master view.
§ 13.2.12 - Filmstrip
The filmstrip can show one or more 24-bit images. It can be used as a record of a series of changes, recording each step as you go, and it can also be used to build animations right in F/x. When images contain alpha transparency, the filmstrip will either ignore the transparency, or blend it according to the settings in the Preferences command in the File menu and the Film Blend color in the Set View Colors command in the Display menu.
§ 13.2.13 - Heightfields
Heightfields are used to generate landscapes both within F/x and for many other programs. F/x represents heightfields as grayscale images.
§ 13.2.13.1 - Grayscale
When F/x processes an image as a heightfield, the image data is treated as brightness information only. This means that heightfields are accurate to 8-bits of precision, or 256 levels. Heightfields are used by the landscape operator. Some types of color keying (steepness and altitude) are specifically designed to work with heightfields, as are some other operators (the cratering and entrainment operators are examples of this.)
§ 13.2.13.2 - DEM (Digital Elevation Maps)
DEM files consist of height information described as a series of text numbers. Using the specialized Load DEM command in the File menu, F/x can load DEM's and convert them into a grayscale representation of the numeric data. Only standard DEM's may be converted; The program "VistaPro" uses a proprietary binary format; these are not actually DEM files and hey cannot be read by F/x.

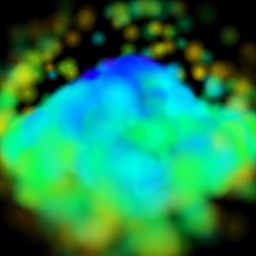
§ 13.2.14 - Textures
F/x can create beautiful textures using the New Heightfield command in the File menu. These textures may be heightfields, as the command implies, but they may also be a wide range of stunning and complex textures you are sure to find useful from time to time. You can create illuminated, shadowed textures directly using this tool. Be sure to check it out.
§ 13.2.15 - 3D Scenes
F/x's ray trace operator uses scripted files called W3D files, written in a human-readable text format to describe all 3D scenes. Details on the scripting language may be found in the language reference section on this page.
§ 13.2.15.1 - Object Definitions
Ray tracing objects are described using very basic geometric components: Three potentially visible objects, which are the triangle, the rectangle, and the sphere. There is also the light, which isn't a visible object, but rather acts to make other objects visible, just as lights do in the real world.
§ 13.2.15.2 - Image Mapping
Images, layers and masters may be "mapped" to the surface of visible objects. Depending on what type of object it is, the image may be distorted to fit; for instance, thinking about how an image would fit on a sphere, you will quickly realize that there is no obvious way to cover the entire surface unless you distort the image.
§ 13.2.15.3 - Bump Mapping
Images, layers and masters may be "mapped" to object surfaces such that they affect the way light reflects from the surface. This gives a very strong visual impression that the surface itself is curved according to the information in the image used as the source for the bump map.
§ 13.2.15.4 - Decision Mapping
Images, layers and masters may be "mapped" to object surfaces such that they affect a choice between two types of algorythmic textures, which are described next.
§ 13.2.15.5 - Algorithmic Texture Color Mapping
Objects may be colored using computed methods that can generate many beautiful and complex patterns that resemble wood, marble and many more interesting textures, many of which do not exist at all in the real world (as far as we know!)
§ 13.2.15.6 - Algorithmic Texture Bump Mapping
Objects may have their light-reflecting characteristics affected by computed methods, in much the same way as the colored textures are applied as described above. This allows very complex surface appearences without the requirement of generating a matching bump-map image.
§ 13.2.15.7 - Mathematical Expressions
Within 3-D scene files, simple numeric parameters may be replaced with quite complex mathematical expressions that describe the parameter in terms of other parameters, time and frame position within an animated sequence and more. You can use complex trigonometric functions, refer to variables that are either static or "tweened" over time for animation purposes. These expressions are one of the keys to realistic motions and other facets of 3d scenes that can get your artwork as close as possible to the "real thing."
§ 13.2.15.8 - Stacks and State Information
Within a 3D scene file, you can use the data-processing concept of a stack to set up complex conditions, save and copy them in one step, modify them for another purpose, use them, and then restore the previous set of states, again all in one step. Stacks are hugely powerful and it is well worth your time to learn to use them.
§ 13.2.15.9 - Keyframes and Animation
F/x's scene language contains robust implementations of tweening and keyframing which allow you to animate various parts of a 3-D scene. You can "fly in" objects, move your viewpoint, in fact you can do almost anything and have it change in a realistic manner over time using the tweening available in the keys statement within the ray trace scripting language.
§ 13.2.15.10 - Extended Scene and Object Controls
There are many other types of control elements in the 3d scene scripting language (SceneScript), such as surface characteristics like transparency and reflectivity. All language elements are detailed here.
§ 13.2.16 - Particle Systems
Particle system files are maintained as human-readable text files. They are read and written by F/x's Particle System Editor. You can hand-edit them, but you would want to be very careful when doing so. It's definitely a job for an expert! Particle systems are described here.
, Previous Page . Next Page t TOC i Index o Operators g Glossary
Copyright © 1992-2007 Black Belt Systems ALL RIGHTS RESERVED Under the Pan-American Conventions
WinImages F/x Manual Version 7, Revision 6, Level A
![]()