| This is a child page. You can use Parent in the quick nav bar at the top or the bottom of the page to navigate directly back to the parent of this page. Some child pages are more than one level deep, and in that case will require more than one Parent click to reach the outermost document level. |
§ 15.14 - Bezier
The Bezier Curve area selection mode can be used to create complex curved regions in a few simple steps.
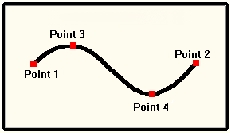
A Bezier curve is a tangential based spline curve. This means that the curve from point one to point three (see diagram below) is based on a tangent to the original line. Bezier curves have four separate control points. The initial position, the end position, and two middle curvature points. These two middle points determine the curvature between the initial and terminating points of the curve.
§ 15.14.1 - Step by Step Guide to Bezier Curve Placement
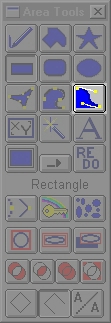
- Select the Bezier Curve tool from the Tool Box.
- Move the cursor into one of the available image views.
- Press the left mouse button to place one end of the curve, and then drag the cursor. A line will stretch from the first point to the mouse position. When the line is the length you want, release the left the mouse button.
- Click the left mouse button somewhere along the new line. This will access the first control handle (Point 3). Drag the cursor away from the specified line. You should notice that a curve will appear. When the curve is the desired shape, press the left mouse button to place the third control point.
-
Now, follow the procedure in step four to place and shape the 4th control point. When the curve is in the desired position and shape. place the final control point with the left mouse button. If you continue to draw with this tool on the current image, the curve will be continued from the second point specified (end of the line). The bezier shape is closed by right clicking when specifying any point. This can become confusing if you right click while specifying the 3rd or 4th points. It is for this reason that we strongly suggest only closing a bezier on the first point. This will automatically close the shape, and allow you to finish manipulating the last "side" of the curve. The diagram below shows an example bezier curve:
It is important to remember that the right mouse button can be used in conjunction with the left mouse button to move the entire curve. Pressing the right mouse button without the left button pressed will signal F/x that you are finished drawing the curve. F/x will then allow you to finish the curve (based on which step you are on), and then will perform the current operation in the specified region.
§ 15.14.2 - Editing Bezier Curves
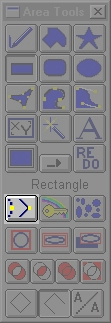
This area selection mode can be edited by selecting the Edit area selection icon from the area tool box.
Once you are in edit mode, no new points may be added to the Bezier curve. You may only adjust the existing points position and the lines' curvature settings. If you drag a point you will simply be moving the points position which can effect the overall curvature of the line.
If you would like to alter only that points curvature, press CTRL after right clicking on the desired point. This will allow you to alter the curvature of that point without eliminating the overall curvature of the entire line.
If you would like to increase or decrease the curvature of an entire group of points, press the Shift key while editing the points. By doing this, you will be editing the whole curve while maintaining the overall curvature of the line.
You also have the option of moving the curve while leaving the current points curvature angle. This means that only the angle at the initial point will remain the same, and the curvature of the rest of the line will be altered.
The keystroke for this type of Bezier editing is CTRL and Shift after you have right clicked on the desired point.
See Also: Area Tools
, Previous Page . Next Page t TOC i Index o Operators g Glossary
Copyright © 1992-2007 Black Belt Systems ALL RIGHTS RESERVED Under the Pan-American Conventions
WinImages F/x Manual Version 7, Revision 6, Level A
![]()