§ 10 - Working with Panels
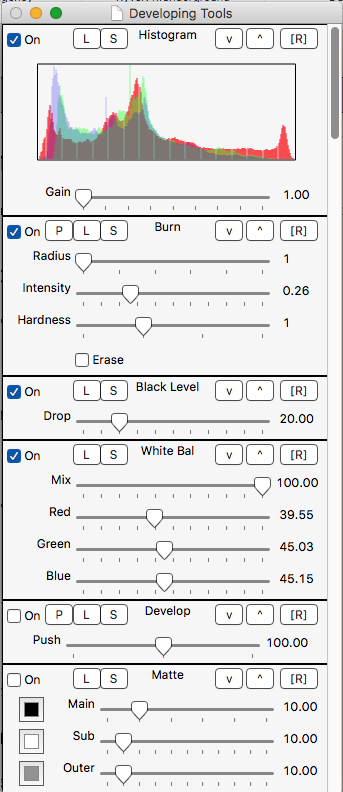
Many of the effects panels have common control elements and other features. This section describes those control elements and their uses.
§ 10.1 - The On Checkbox ✓ On
✓ On allows you to turn any developing tools window panel on and off once the panel has been activated. To activate a panel, adjust one of its controls. Don't turn on panels using this checkmark unless they've already been activated.
§ 10.2 - The S Button
S allows you to save the settings of a panel for later re-use.
§ 10.3 - The L Button
L allows you to load previously saved settings for a particular panel for re-use.
§ 10.4 - The ^ Button
^ moves a panel up one position in the developing tools window.
§ 10.5 - The v Button
v moves a panel down one position in the developing tools window.
§ 10.6 - The [R] Button
[R] resets the panel to its default settings.
§ 10.7 - Painting
Operations that allow you to paint in an effect, such as Dodge and Burn, are modal; that means that you enter into a mode (specifically, a painting mode), apply the effect to the image using left-click brushstrokes, and then exit the mode using a right-mouse-click with the mouse still over the image window.
§ 10.7.1 - The P Button
P turns on the painting mode. Exit this mode by clicking the right mouse button.
§ 10.8 - Floating Panels
Often when working with an image, there will be a particular subset of effects that you're using, while others will not be in use. You can float all the panels that are ✓ On to the top of the developing tools window using ⌘-F. This will move all the enabled panels to the top of the developing tools window. You can then arrange them using the individual panel v and ^ controls.
You can also float specific panels to the top, regardless of whether they are ✓ On or not. To do this, press f and then follow with the appropriate single keystroke:
| Key | Floated Operator |
|---|---|
| 1 | Horizontal Ruler |
| 2 | Vertical Ruler |
| 3 | Grid |
| 4 | Re-color |
| 5 | Black Level |
| 6 | Curves |
| 7 | Downsize |
| 8 | Color Balance |
| 9 | Black Balance |
| 0 | Low Level Blur |
| a | Astro CA Removal |
| b | Badge |
| c | CEBR |
| d | De-Vignette |
| e | Crop |
| f | Flip |
| g | Geom |
| h | Histogram |
| i | Hot / Cold Indication |
| j | Marker |
| k | Shadows and Highlights |
| l | Levels |
| m | Monochrome |
| n | Luma Remap |
| o | Sepia |
| p | Blur |
| q | RIP Noise Reduction |
| r | Recover |
| s | Saturation |
| t | Tint |
| u | Sharpen |
| v | Vignette |
| w | White Balance |
| x | Window and Level |
| y | Local Contrast |
| z | Low Level Saturation |
| B | Burn |
| D | Dodge |
, Previous Page . Next Page t TOC i Index o Operators g Glossary
| Please consider supporting my dTank (β) development efforts via a small PayPal donation. |
